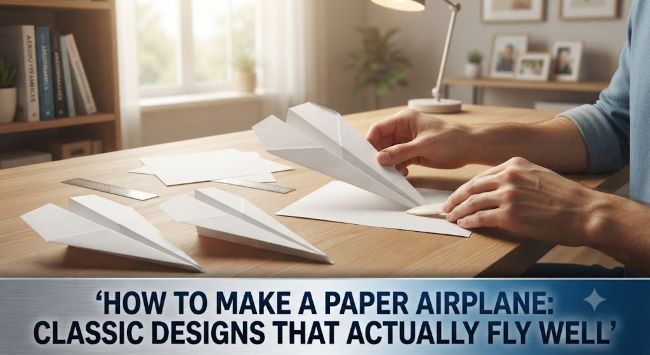
How to Make a Paper Airplane: Classic Designs That Actually Fly Well
Paper airplane folding is one of those genuinely satisfying skills that almost everyone learns at some point but few people ever refine beyond the most basic dart shape, missing out on the meaningful flight performance differences between casual folding and a properly executed design. This guide covers several reliable classic designs along with the folding precision and adjustment techniques that actually determine whether your paper airplane flies impressively or just flutters to the ground after a few feet.
The Classic Dart (Best for Speed and Distance)
This is the most recognizable paper airplane design and a genuinely strong performer for straight-line distance and speed when folded with reasonable precision.
Step 1: Start with a standard sheet of paper (8.5×11 inch works well) oriented in portrait position. Fold it in half lengthwise, then unfold to create a center crease line.
Step 2: Fold the top two corners down to meet the center crease, creating a triangular point at the top.
Step 3: Fold the new angled top edges down again to meet the center crease, making the point even narrower and more elongated.
Step 4: Fold the entire plane in half along the original center crease, with the folded point on the outside.
Step 5: On each side, fold down a wing, with the top edge of each wing fold aligning with the bottom edge of the body, creating the characteristic wing shape.
Step 6: Open the wings out to roughly horizontal, with a slight upward angle (dihedral) relative to the body, which improves stability during flight.
The Glider (Best for Hang Time and Smooth Flight)
This design prioritizes slower, more stable, longer-duration flight over raw speed, making it a satisfying design for distance through sustained gliding rather than initial throwing velocity alone.
Step 1: Fold the paper in half lengthwise, then unfold.
Step 2: Fold the top corners to the center, similar to the dart’s starting steps, creating an initial triangular point.
Step 3: Fold the top point down so it meets roughly the bottom of the angled edges you just created, forming a flat horizontal edge.
Step 4: Fold the top corners in again toward the center, similar to the previous folding pattern but now working with this new flatter top edge.
Step 5: Fold the plane in half along the center crease.
Step 6: Fold down wider, wider-set wings than the dart design, since the glider’s flight characteristics benefit from greater wing surface area relative to body length compared to the speed-focused dart.
The Stunt Plane (Best for Loops and Tricks)
This design incorporates features specifically supporting aerobatic flight patterns rather than pure straight-line performance.
Step 1: Begin with the same basic folding sequence as the dart design through the initial point-creation steps.
Step 2: After folding the plane in half and creating the wings, add small flap cuts or folds at the back outer edge of each wing (small upward or downward bent flaps), which function similarly to an actual aircraft’s elevators, allowing you to influence the plane’s pitch behavior during flight.
Step 3: Experiment with the angle of these rear flaps — upward-bent flaps generally produce upward pitch and looping behavior, while downward-bent flaps tend to produce a dive, giving you meaningful control over the specific trick or flight pattern you’re trying to achieve.
Tips for Better Flight Performance
Fold with genuine precision, using a flat, hard surface. Sloppy, imprecise folds create asymmetry that causes the plane to veer off course or fly erratically rather than in a controlled, predictable pattern. Running your fingernail or a ruler edge along each fold to create a sharp, crisp crease meaningfully improves both the structural integrity and the symmetry of your finished plane.
Use appropriate paper weight. Standard printer paper (20lb weight) works well for most designs and is genuinely the most common and reliable choice. Significantly heavier paper can be harder to fold precisely and may affect flight characteristics, while very lightweight paper can be too flimsy to hold its folded shape well during flight.
Check for symmetry before throwing, comparing both wings and both sides of the body to ensure they genuinely mirror each other, since asymmetric folding is one of the most common reasons a paper airplane curves unpredictably rather than flying in your intended direction.
Adjust wing angle for different flight characteristics. A slight upward angle on the wings (dihedral, where the wings angle upward from the body rather than sitting perfectly flat) generally improves stability, while flat or slightly downward-angled wings can produce faster but less stable flight depending on the specific design and your throwing technique.
Throw with a smooth, level release rather than a forceful, jerky motion. A controlled, level throw motion, releasing the plane at a slight upward angle rather than perfectly flat or angled too steeply upward, generally produces better, more consistent flight results than an overly forceful throw that can destabilize the plane immediately upon release.
Make small adjustments and test repeatedly. Paper airplane performance often benefits from iterative small adjustments — slightly bending a wing tip, adjusting the nose weight by adding a small paper clip, or modifying the wing angle — tested through repeated throws to observe how each specific change affects flight behavior, rather than expecting a perfect result on the very first attempt with any given design.
Troubleshooting Common Problems
Plane consistently curves to one side: check for asymmetric folding between the two wings or sides, which is the most common cause of consistent directional curving rather than straight flight.
Plane noses down quickly after throwing: try adding a small paper clip to the nose for additional forward weight, or check whether your wing angle might be contributing to this nose-heavy flight pattern.
Plane flutters and doesn’t maintain stable flight: this often indicates the paper is too lightweight for the specific design, or that the wings need a more pronounced upward dihedral angle to improve stability.
Plane simply doesn’t travel very far: for distance specifically, the dart design generally outperforms other designs, and ensuring genuinely sharp, precise folds throughout (rather than loose, imprecise creases) typically produces a meaningful distance improvement over a more casually folded version of the same basic design.
Key Takeaways
- The classic dart design prioritizes speed and straight-line distance, while the glider design favors slower, more stable, longer-duration flight through greater wing surface area
- A stunt plane design incorporates small rear wing flaps that function similarly to actual aircraft elevators, allowing for intentional loops and pitch control during flight
- Fold with genuine precision using a flat, hard surface and sharp creases, since sloppy or asymmetric folding is the most common cause of poor or erratic flight performance
- Standard 20lb printer paper works well for most designs, offering a reliable balance between fold precision and structural integrity during flight
- A slight upward wing angle (dihedral) generally improves flight stability, while throwing with a smooth, level release at a slight upward angle produces more consistent results than a forceful or jerky throw
- Troubleshoot specific flight problems systematically: consistent curving suggests asymmetric folding, quick nose-diving suggests insufficient nose weight or wing angle issues, and fluttering suggests paper weight or insufficient wing dihedral
- Iterative small adjustments tested through repeated throws, rather than expecting a perfect result on the first attempt, generally produces the best final flight performance for any given design