
How to Stop Screen Recording on Mac
Learn how to stop screen recording on Mac using keyboard shortcuts, the menu bar, and QuickTime. This guide covers every method so you can end your recording quickly and find your file.
You are in the middle of a screen recording on your Mac and now you need to stop it. Whether you started the recording with a keyboard shortcut, through QuickTime, or using a third-party app, stopping a screen recording on Mac is straightforward once you know where to look. The method you use to stop it depends on how you started it, and this guide covers all of them.
How to Stop a Screen Recording Started with the Keyboard Shortcut
If you started your screen recording by pressing Command + Shift + 5 (available on macOS Mojave and later), stopping it is just as quick.
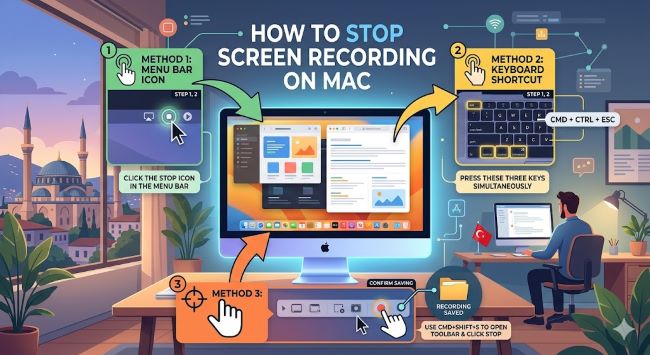
Option 1: Click the Stop button in the menu bar
Look at the top right of your screen in the menu bar. While a screen recording is active, you will see a small square stop button (it looks like a filled square). Click it to stop the recording immediately.
Option 2: Use the keyboard shortcut
Press Command + Control + Escape to stop the recording without touching the menu bar.
After stopping, a thumbnail of the recording appears in the bottom right corner of your screen. Click it to preview and edit, or wait for it to disappear and find the file saved to your desktop by default.
How to Stop a Screen Recording in QuickTime Player
If you started the recording through QuickTime Player > File > New Screen Recording, you have two ways to stop it.
Option 1: Click the Stop button in the menu bar
The same square stop button appears in the menu bar. Click it to end the recording.
Option 2: Use the keyboard shortcut
Press Command + Control + Escape. QuickTime stops the recording and opens the file automatically in the QuickTime window, where you can play it back, trim it, and save it.
Go to File > Save in QuickTime to choose where you want to store the finished recording. QuickTime saves screen recordings as .mov files by default.
How to Stop a Screen Recording on iPhone or iPad Connected to Mac
If you are recording your iPhone or iPad screen through QuickTime on your Mac (using a cable connection), the stop process is the same. Click the stop button in the menu bar or press Command + Control + Escape on your Mac keyboard.
How to Stop Screen Recording in Third-Party Apps
If you are using a third-party screen recorder like Loom, Screenflick, or Cleanshot X, look for a stop button in the app’s own toolbar or floating control panel. Most of these apps display a small recording indicator or control bar on screen while recording is active.
- Loom: Click the Loom icon in the menu bar and select Stop Recording, or press the keyboard shortcut shown in Loom’s settings.
- Screenflick: A floating control panel appears during recording. Click Stop in that panel.
- CleanShot X: Click the stop button in the CleanShot recording toolbar.
Each app handles file saving differently, so check the app’s preferences to see where your recordings are stored by default.
Where Are Screen Recordings Saved on Mac?
By default, Mac screen recordings save to your Desktop. If you changed the save location in the Screenshot toolbar (Command + Shift + 5 > Options > Save to), your recordings go to the folder you selected.
QuickTime recordings prompt you to choose a save location when you stop. If you close QuickTime without saving, it will ask you to save before closing.
Quick Reference: Stop Screen Recording on Mac
| Method | How to Stop |
|---|---|
| Command + Shift + 5 | Click stop button in menu bar or press Cmd + Ctrl + Escape |
| QuickTime Player | Click stop button in menu bar or press Cmd + Ctrl + Escape |
| Loom | Click Loom icon in menu bar > Stop Recording |
| Other third-party apps | Use the app’s own stop button or toolbar |
The Short Answer
To stop a screen recording on Mac, click the square stop button in the menu bar or press Command + Control + Escape. This works for recordings started with the built-in Mac screenshot tool and QuickTime Player. For third-party apps, use the stop control in the app’s own interface. Your recording saves to the desktop by default unless you changed the save location.


