
What Font Is MLA Format?
Wondering what font is MLA format? MLA recommends a readable 12pt font like Times New Roman. This guide covers MLA font rules, size, spacing, and full formatting requirements.
If you have an MLA format paper due and you are not sure what font to use, you are in good company. MLA format has specific guidelines for how a paper should look, and the font is one of the first things to get right before you start writing. The short answer is that MLA format recommends a clear, readable font at 12 point size, with Times New Roman being the most widely used and accepted choice. But the full picture is worth understanding, especially since MLA’s guidelines have evolved with newer editions.
What Font Does MLA Format Require?
The MLA Handbook does not lock you into a single specific font. Instead, it asks for a font that is readable and does not draw attention to itself. The goal is that the font serves the content without making the reader think about the typography.
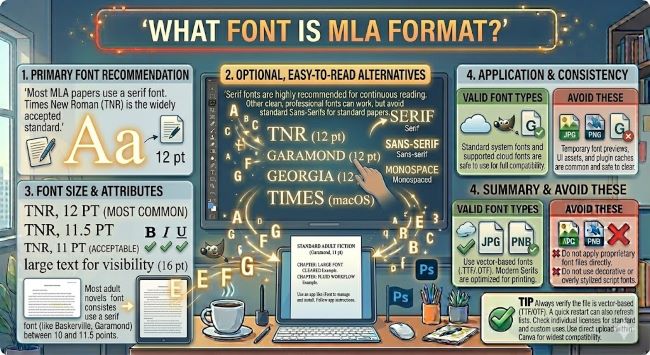
That said, Times New Roman 12pt is the font most instructors expect and most style guides point to when referencing MLA format. It has been the de facto standard for academic papers for decades and is almost universally accepted.
Other fonts that meet MLA’s readability requirement include:
- Georgia 12pt: A serif font designed for screen readability that also works well in print. Slightly more open than Times New Roman.
- Garamond 12pt: A classic serif with a refined look. Common in publishing and accepted for academic work.
- Calibri 12pt: A clean sans serif that is Word’s default font. Acceptable for MLA as long as your instructor does not specifically require a serif font.
- Arial 12pt: Another sans serif that reads clearly and is widely available.
When in doubt, use Times New Roman 12pt. It is what most instructors picture when they think of a properly formatted MLA paper, and it is never the wrong choice.
MLA Font Size: Why 12pt Matters
MLA format specifies 12 point font size for all body text. This is not arbitrary. At 12pt, most readable fonts produce text that is comfortable to read without straining, fits a standard amount of content per page, and aligns with the one-inch margin and double-spacing requirements that the rest of MLA formatting is built around.
Using a smaller font to fit more content on fewer pages, or a larger font to pad a paper’s length, is something instructors notice. Stick to 12pt throughout the document, including the header, body text, and Works Cited page.
Full MLA Formatting Requirements
Font and size are just two pieces of the MLA format puzzle. Here is the complete set of formatting requirements so you can check everything at once:
- Font: Readable serif or sans serif, 12pt (Times New Roman is standard)
- Margins: One inch on all sides
- Line spacing: Double-spaced throughout, including the Works Cited page
- Paragraph indentation: Half inch indent for the first line of each paragraph (use the Tab key, not spaces)
- Header: Your last name and page number in the top right corner of every page
- First page heading: No title page. Instead, the top left of the first page includes your name, your instructor’s name, the course name, and the date, each on its own line, double-spaced
- Title: Centered on the line after the heading, in title case, with no bold, italic, underline, or quotation marks
- Works Cited: Starts on a new page, with “Works Cited” centered at the top. Entries use a hanging indent (first line flush left, subsequent lines indented half an inch)
All of these elements work together. If the font or spacing is off, the rest of the formatting tends to look off too.
How to Set MLA Font in Microsoft Word
- Open your document in Word.
- Press Ctrl + A (Windows) or Cmd + A (Mac) to select all text.
- In the Home tab, set the font to Times New Roman and the size to 12.
- Set line spacing to 2.0 (double spacing) through Home > Line and Paragraph Spacing.
- Make sure no extra space is added before or after paragraphs. Go to Line and Paragraph Spacing > Remove Space After Paragraph.
- Set all margins to one inch through Layout > Margins > Normal.
Setting this up at the start of the document means the page count you see while writing is accurate, and you will not need to reformat after the fact.
How to Set MLA Font in Google Docs
- Open your Google Doc.
- Go to Format > Paragraph styles > Normal text and select Update Normal text to match after setting your preferred font and size.
- Set font to Times New Roman and size to 12 using the toolbar.
- Go to Format > Line and paragraph spacing > Double.
- Make sure Add space before paragraph and Add space after paragraph are both unchecked.
- Set margins to one inch through File > Page setup.
Google Docs defaults to one-inch margins, so that part is usually already correct.
What If My Instructor Specifies a Different Font?
If your instructor or assignment sheet specifies a particular font, follow their instructions over MLA’s general guidelines. MLA format is a style guide, not a law. When an instructor says “use Calibri” or “use Arial,” that overrides the MLA recommendation. Always defer to what the person grading the paper asks for.
If no font is specified and you are following MLA, Times New Roman 12pt is the safe, universally accepted default.
The Short Answer
MLA format calls for a clear, readable font at 12 point size. Times New Roman 12pt is the standard choice and the one most instructors expect. Set it up at the start of your document alongside one-inch margins and double spacing, and your paper’s formatting will be in good shape from the first line to the Works Cited page.

")


