
LiftMaster Garage Door Opener Battery: The Complete Replacement Guide
The moment your LiftMaster garage door opener stops responding or beeps at you without an obvious reason, there is a good chance the battery is the problem. The liftmaster garage door opener battery is one of those things you don’t think about until something goes wrong, and when it does go wrong, it usually happens at the worst possible time: during a power outage, in the rain, or when you are running late. This guide covers everything in one place, from the signs that tell you it’s time to replace the battery, to which battery fits which component, to a clear step-by-step process for the opener’s backup battery, the remote, and the keypad.
There Are Three Different Batteries to Know About
Before buying anything, understand that a LiftMaster garage door system typically uses three different battery types across three different components. Getting the wrong one is the most common mistake people make.
1. The backup battery inside the opener unit This is the sealed lead-acid (SLA) battery housed inside the motor unit mounted on your ceiling or wall. It powers the opener during power outages. Most modern LiftMaster openers use a 12V battery, most commonly the LiftMaster 485LM. Other compatible options include the 475LM and the 041B0591 depending on the model. This battery lasts one to two years under normal conditions.
2. The remote battery The liftmaster garage door opener remote uses a small coin-cell lithium battery. Most LiftMaster remotes take a CR2032 (3V). Some older or multi-button remotes use a CR2025 or a 12V A23 battery. These are available at any hardware store or pharmacy and are inexpensive to replace.
3. The keypad battery The liftmaster garage door opener keypad uses a 9V battery, located at the back or bottom of the keypad unit. This is a standard alkaline 9V battery, the same size used in smoke detectors. It powers the wireless keypad and typically lasts one to two years.
Signs That Your LiftMaster Battery Needs Replacing
The opener and its connected components give you clear signals before they stop working entirely. Watch for these:
Backup battery (inside the opener):
- The opener beeps at regular intervals (often every 30 seconds or so)
- The LED indicator on the unit shows a solid red light, meaning the battery is critically low
- The LED flashes orange, which usually means the battery needs charging rather than replacement (plug in the opener and wait)
- The garage door fails to operate during a power outage
- The door moves slower than usual even when power is available
Remote battery:
- The remote only works when you are standing very close to the opener
- The remote works intermittently or requires multiple button presses
- The remote stops working entirely
Keypad battery:
- The keypad display dims or becomes difficult to read
- The keypad does not respond when you enter your PIN
- The opener doesn’t activate after a correct code entry
LiftMaster Battery Replacement: The Backup Battery Step by Step
Replacing the backup battery inside the opener unit requires a bit more care than replacing a remote battery. Before starting, gather a Phillips head screwdriver and the correct replacement battery (check your model number first, as described below).
- Disconnect the power. Locate the power cord running from the opener unit to a wall outlet, usually above the motor. Climb a stable ladder and unplug the power cord. Do not skip this step. The opener is connected to your home’s power supply, and working on it while plugged in creates a shock risk.
- Remove the light cover. Most LiftMaster models have a light lens on the bottom of the unit. Press the release tab or use a flathead screwdriver to remove it. Some models require a Phillips screwdriver to remove screws.
- Open the battery compartment. Once the light cover is off, you should see the battery compartment cover. Remove it by pressing the tab or unscrewing the fasteners.
- Disconnect and remove the old battery. Unplug the wire harness connected to the battery terminals. Some models have a connector; others use individual wires. Remove the battery from the compartment.
- Connect the new battery. Slide the new battery partway into the compartment with the terminals facing out. Connect the wires to the matching terminals: red to red (positive), black to black (negative). Make sure no wires are pinched or crimped.
- Reassemble the unit. Replace the battery compartment cover, then reattach the light cover.
- Plug the opener back in. Once the cover is back in place, restore power. The LED indicator will blink green while charging. When it turns solid green, the battery is fully charged, which takes up to 24 hours for a complete initial charge.
- Test it. Once charged, test the backup battery by pressing the button on the unit while unplugged from the wall. The opener should operate normally. If it does, the replacement was successful.
How to Replace the Remote Battery
This is the simplest battery replacement in the LiftMaster system.
- Flip the remote over and locate the small slot or seam on the back cover.
- Use a flathead screwdriver or a coin to gently pry the case open. Do not force it.
- Remove the old coin cell battery and note which side faces up.
- Insert the new CR2032 (or CR2025, depending on your remote) in the same orientation, with the positive side matching the marking in the compartment.
- Snap the case closed and test the remote from a normal distance.
If the remote still does not work after a fresh battery, the issue may be that the remote needs to be reprogrammed to the opener rather than a battery problem.
LiftMaster Garage Door Opener Keypad Battery Replacement
The liftmaster garage door opener keypad runs on a standard 9V battery. Replacing it takes about two minutes.
- Lift the keypad faceplate or slide the battery cover down (the design varies by keypad model).
- Locate the 9V battery in the compartment at the back or bottom of the keypad.
- Disconnect the old battery by unclipping the connector.
- Snap the new 9V battery into the connector in the same orientation.
- Close the cover and test the keypad by entering your PIN.
If the keypad is still unresponsive after a new battery, check that the opener is powered and that the keypad is within range of the antenna on the opener unit.
Battery for the LiftMaster 98022
The LiftMaster 98022 is a jackshaft (side-mount) garage door opener from the Elite Series. It mounts to the wall beside the door rather than on the ceiling, making it ideal for garages with low ceilings or high-lift doors. It includes built-in battery backup and WiFi, and can lift sectional doors up to 850 lbs.
The compatible replacement battery for the liftmaster 98022 is the 485LM (12V sealed lead-acid). This is the same battery used across most of the modern LiftMaster Elite and Premium Series lineup. You can also find this battery listed as compatible with the 8500W, the previous model the 98022 replaced.
When purchasing a replacement, confirm you are buying the 485LM or a verified compatible 12V SLA battery. Third-party options exist, but verify the voltage and ampere-hour rating matches the original (12V, 4.5Ah is standard for the 485LM).
Battery for the LiftMaster 87504
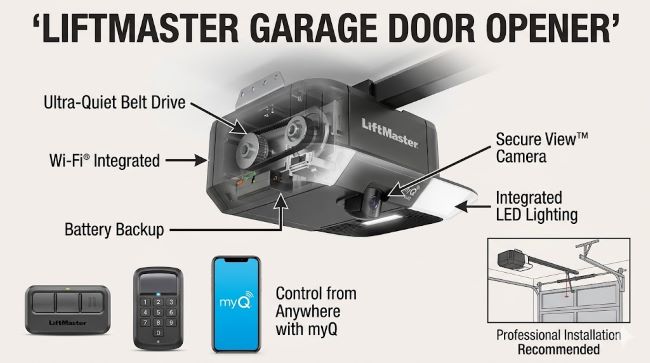
The LiftMaster 87504 is a belt-drive garage door opener with Wi-Fi and battery backup built in. It sits in the Premium Series range and is a popular choice for homeowners who want quiet operation with the security of backup power.
Like the 98022, the 87504 uses the LiftMaster 485LM backup battery. The eBay and aftermarket listings confirm this compatibility across the 87504, 8500, and 98022, making the 485LM the current go-to battery for this tier of LiftMaster openers.
If your 87504 is beeping and the LED shows red, do not simply charge the existing battery by plugging in the unit. A solid red means the battery is at end of life and needs physical replacement, not just a charge cycle.
How Long Does the LiftMaster Battery Backup Last?
Under normal use, the backup battery in a LiftMaster opener lasts between one and two years. Several factors affect this lifespan:
- Frequency of power outages. The more the battery is drawn down and recharged, the faster it degrades.
- Temperature extremes. Garages that get very hot in summer or very cold in winter shorten battery life.
- Age of the unit. Older openers may have less efficient charging circuits that stress the battery more.
- Quality of the replacement battery. OEM LiftMaster batteries (485LM) are built to spec. Some generic replacements use lower-quality cells that degrade faster.
A good habit is to replace the battery every two years as scheduled maintenance, regardless of whether it shows signs of failure. This is cheaper and less stressful than replacing it after a power outage leaves you locked out.
Common Mistakes to Avoid
A few errors come up repeatedly when homeowners replace LiftMaster batteries:
- Using the wrong battery. Always check your model number and match it to the correct battery type. The CR2032 for the remote, 9V for the keypad, and 485LM for the opener are not interchangeable.
- Installing the battery backwards. This applies to the remote coin cell (check the + marking in the compartment) and the connector wires on the backup battery (red to red, black to black).
- Working on the opener while it is still plugged in. Disconnect power before touching any component inside the motor unit.
- Not giving the new battery a full initial charge. After replacing the backup battery, allow 24 hours for a full first charge. Testing too early gives you a false read on whether it is working correctly.
- Skipping the test. After any battery replacement, test the component immediately. For the backup battery, unplug the opener and verify the door still operates.
Where to Buy the Replacement Battery
The 485LM is available through:
- LiftMaster’s official website (liftmaster.com)
- Amazon, where it is widely listed as a standalone replacement
- Home Depot and Lowe’s, which typically stock it in the garage door section
- eBay, where new OEM units are available, often at lower prices
Avoid purchasing batteries from sites without verifiable product information. For the backup battery, buying OEM or a verified compatible unit is worth the small additional cost over generic options.
If you are exploring smart home upgrades alongside the opener battery replacement, smart home design resources and icon sets give a useful visual reference for home automation planning. For homeowners interested in controlling their garage door remotely through an app, understanding how to build or evaluate smart home apps for iOS and Android is useful context. And for anyone managing multiple home maintenance schedules and tasks, apps built for tracking and managing tasks on the go help keep replacement schedules and purchase records organized.
Key Takeaways
- The LiftMaster garage door opener battery system has three separate batteries: a 12V SLA backup battery in the opener (485LM), a CR2032 coin cell in the remote, and a 9V in the keypad.
- Signs of a dying backup battery: regular beeping, solid red LED, failure during power outages, and slow operation.
- LiftMaster battery replacement for the opener unit requires unplugging the opener, removing the light cover, disconnecting the old battery, connecting the new one correctly (red to red, black to black), and giving it a full 24-hour initial charge.
- Battery for garage door opener remotes: CR2032 for most LiftMaster remotes. Replace by prying open the case and swapping the coin cell.
- LiftMaster garage door opener keypad: uses a standard 9V battery. Slide down the cover, swap the battery, and test the PIN.
- The LiftMaster 98022 and LiftMaster 87504 both use the 485LM 12V sealed lead-acid backup battery.
- Replace the backup battery every one to two years as preventive maintenance, regardless of symptoms.


