
How to Turn Digital Art and Photos Into Wall Decor: A Step-by-Step Guide
Most of us have hundreds of images sitting on a phone, a hard drive, or a cloud account: travel photos, family portraits, illustrations, and digital artwork. Very few ever make it onto a wall. The good news is that turning a digital file into real decor has become straightforward, and you do not need a design degree to get a professional result.
One of the most popular formats is canvas prints, which give an image a soft, textured, gallery-style finish without the need for glass or a heavy frame. For statement walls above a sofa, a bed, or a workstation, large canvas prints can anchor an entire room with a single image. Platforms such as CanvasChamp let you upload a file, choose a size, and preview the layout before ordering.
This guide walks you through the process, from picking the right image to hanging the finished piece.
Step 1: Choose Images With Strong Visual Impact
Not every image works on a wall. Look for photos or artwork with clear subjects, good lighting, and balanced composition. Busy backgrounds and tiny details tend to disappear at a distance, while bold shapes and clean color hold up well.
Ask yourself whether you would enjoy looking at this image every day. If the answer is yes, it is a strong candidate.
Step 2: Check Resolution Before You Print
Resolution is the most common reason prints turn out soft. As a rule of thumb, aim for roughly 150 pixels per inch at the final print size. A 24 by 36 inch print, for example, works best with a file around 3600 by 5400 pixels.
If your image is smaller, avoid stretching it. Use the original camera file instead of a compressed copy from social media, and test the result by zooming to 100 percent on your screen. Visible blur or jagged edges at that zoom suggest a smaller print size is safer.
Step 3: Edit for Print, Not Just Screens
Screens glow, while printed surfaces reflect light, so images often look slightly darker on a wall. Brighten shadows a little, boost contrast gently, and avoid extreme saturation.
Crop with the final shape in mind. A horizontal photo may need extra space around the subject to fit a square or vertical layout. Leave some breathing room near the edges, since canvas wraps around the frame and can hide a small portion of the image.
Step 4: Pick the Right Size and Layout
Size shapes the entire effect. A common guideline is to fill about two-thirds of the wall space above a piece of furniture. Smaller prints can look lost on a big wall, while an oversized piece feels intentional and confident.
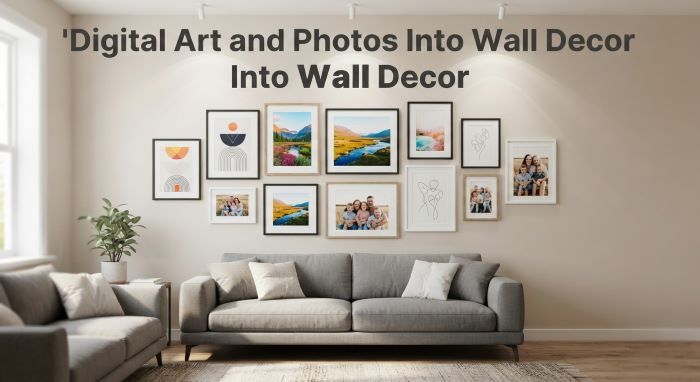
Consider the layout as well. A single large image creates a calm focal point. A set of three panels, called a triptych, works well on wide walls. A gallery grid of matching sizes suits hallways and stairwells.
Step 5: Match the Print to Your Room
Look at the colors already in the room, including furniture, rugs, and curtains. Choose an image that repeats one or two of those tones, or deliberately contrasts with them for a bolder look.
Style matters too. Soft landscapes suit bedrooms, graphic illustrations suit studios and offices, and warm family portraits belong in living rooms and hallways. Matching the mood of the image to the function of the space makes the result feel cohesive.
Step 6: Preview Before You Order
A digital preview helps you catch problems early. Check the cropping, the orientation, and the way the edges wrap around the frame. Read any proofing notes, and confirm the final dimensions before checkout.
It also helps to cut paper to the print’s size and tape it to the wall. Live with the template for a day to confirm the scale feels right.
Step 7: Hang It With Care
Hang art so the center sits about 57 inches from the floor, which is roughly average eye level. Use wall anchors for heavier pieces and check weight limits on hooks. A small level saves a lot of frustration, since a slightly crooked piece is easy to notice.
If you rent, lightweight pieces can often hang on removable strips designed to protect paint.
Final Thoughts
Turning digital files into wall decor is one of the simplest ways to personalize a home. Start with a great image, check the resolution, plan the size, and preview the result. A little preparation goes a long way, and your favorite images deserve more than a spot on a screen.