
Best At Home Teeth Whitening Kits: A Complete Buyer’s Guide
A bright smile makes a strong impression, but professional whitening at a dentist can cost a small fortune. That is why so many people turn to whitening they can do from the couch. The market is packed with options, from LED light kits to strips to pens, and the quality varies wildly. Some deliver real results, while others are a waste of money or even risky for your enamel. This guide sorts through the noise, covering the best at home teeth whitening kits, how they work, and how to whiten without harming your teeth.
How at-home whitening works
Before comparing products, it helps to understand the basics. Most whitening kits rely on a bleaching agent, usually hydrogen peroxide or carbamide peroxide. These break down stains on and below the surface of the enamel, lifting years of discoloration from coffee, tea, wine, and food.
The concentration of that peroxide and the contact time determine how well a kit works. The best at home teeth whitening kits use an effective but safe concentration and keep the gel in contact with your teeth long enough to work. Whitening does not physically scrub stains away so much as chemically break them apart, which is why the active ingredient matters far more than any brush or light.
The main types of kits
There are several formats, and each has strengths and weaknesses. Here is how the main types stack up when you are choosing a whitening system.
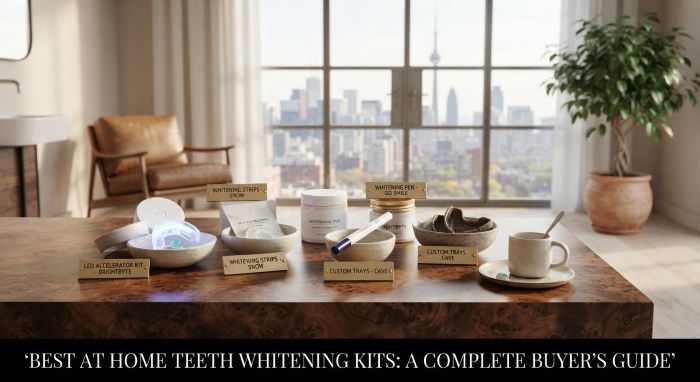
- LED light kits with trays: You apply gel to a mouth tray and wear it with an LED light, which is meant to speed up the process. These are among the most popular and often the most effective for full-mouth whitening.
- Whitening strips: Thin, flexible strips coated in gel that stick to your teeth. Convenient, affordable, and effective, though they can miss the gaps between teeth.
- Whitening pens: A brush-on gel in a pen form. Great for touch-ups and travel, but generally less powerful for deep whitening.
- Custom tray kits: Some kits mold a tray to your teeth for better gel contact. These can rival professional results but cost more.
- Whitening toothpastes: Mild and slow, better for maintaining results than achieving dramatic change.
For most people, an LED tray kit or quality strips offer the best balance of results and value. The top products in these categories can noticeably brighten your smile over a couple of weeks.
What to look for in a kit
Not every product is worth buying. When comparing the best at home teeth whitening kits, keep these factors in mind:
- Active ingredient: Look for hydrogen peroxide or carbamide peroxide at a reasonable concentration. This is what actually whitens.
- ADA acceptance or dental endorsement: A seal from a recognized dental body signals safety and effectiveness.
- Sensitivity features: Some kits include ingredients to reduce sensitivity, which is a big plus.
- Ease of use: A kit you will actually use consistently beats a complicated one you abandon.
- Treatment time and duration: Check how long each session takes and how many days the full course runs.
Do not just chase the brightest before-and-after photos in the ads. The ones worth buying have a proven active ingredient, safety credentials, and a routine you can stick to.
Quick comparison of kit types
Here is a snapshot to help you weigh the options.
| Type | Effectiveness | Convenience | Best for |
|---|---|---|---|
| LED tray kit | High | Moderate | Full-mouth whitening |
| Whitening strips | High | High | Affordable, easy results |
| Whitening pen | Low to moderate | Very high | Touch-ups and travel |
| Custom tray kit | Very high | Moderate | Near-professional results |
| Whitening toothpaste | Low | Very high | Maintaining results |
How to whiten safely
Whitening is generally safe when done correctly, but overdoing it can damage enamel and cause sensitivity. To get the most from the best at home teeth whitening kits without harming your teeth, follow these guidelines:
- Read and follow the instructions exactly. Do not leave gel on longer than directed.
- Do not whiten too often. Overuse wears enamel and increases sensitivity.
- Start with clean teeth, since whitening works best on a clear surface.
- Avoid staining foods and drinks during your treatment period.
- If you feel sharp pain or lasting sensitivity, stop and give your teeth a break.
Patience matters. Gradual whitening over the recommended period is safer and more even than trying to rush results, which can leave you with sensitive teeth and patchy color.
Managing sensitivity
Tooth sensitivity is the most common side effect of whitening. If your teeth twinge with cold or the gel stings, that is your cue to slow down. To manage it while using the best at home teeth whitening kits:
- Use a toothpaste made for sensitive teeth before and during treatment
- Whiten less frequently, giving your teeth rest days
- Choose a kit with a lower peroxide concentration
- Avoid very hot or cold foods during your whitening course
Some sensitivity is normal and temporary, but sharp or lasting pain is a sign to stop and talk to a dentist.
When to see a professional
At-home kits work well for everyday surface stains, but they have limits. Deep discoloration, stains from certain medications, or issues below the gumline often need professional care. If your teeth do not respond to over-the-counter kits, a dentist can offer stronger, supervised treatments. This guide to Professional Teeth Whitening Near Me is a helpful next step if home kits are not getting you where you want to be.
It is also worth remembering that whitening works best on clean, healthy teeth. Plaque and tartar buildup can block the gel and leave uneven results, so good oral hygiene comes first. This guide on How to Remove Plaque From Teeth is worth reading before you whiten, since a clean surface helps the gel work evenly. And if you have any dental issues like cavities, address those first, since whitening over untreated problems can cause pain. A resource like Dental Fillings Near Me can help you take care of those before you start, so whitening goes smoothly.
What causes teeth to stain in the first place
Understanding why teeth discolor helps you whiten smarter and keep results longer. Stains fall into two broad types. Extrinsic stains sit on the surface of the enamel and come from things you eat and drink, like coffee, tea, red wine, cola, and dark berries, as well as smoking. These are the stains that at-home whitening handles best. Intrinsic stains form inside the tooth, from causes like aging, certain medications, too much fluoride in childhood, or injury. These are deeper and harder to shift with over-the-counter products.
Knowing which type you have sets your expectations. If your discoloration is mostly from years of coffee and wine, the best at home teeth whitening kits will likely deliver a satisfying result. If your teeth are grayish or discolored from medication or age, you may need professional help for real change. Most people have a mix, so home whitening improves the surface while a dentist can address the deeper tones.
How long results take to show
Patience is part of the process, and expectations matter. Most kits show gradual results over the course of a treatment period, typically one to two weeks of daily or near-daily use. LED tray kits and strips usually reveal visible brightening within a few days, with the fullest result by the end of the course. Pens and toothpastes work more slowly and subtly.
Do not expect a dramatic Hollywood transformation overnight. A quality kit lifts your natural shade by several levels, which looks noticeably brighter but still natural. Whitening also has a ceiling, since it brightens your existing enamel rather than turning teeth artificially white. If you want a specific target shade beyond what home kits reach, a dentist can advise on professional options.
Who should be cautious with whitening
Whitening is not right for everyone, or at every moment. Some people should hold off or check with a dentist first. Pregnant or nursing women are generally advised to wait, since the effects have not been well studied. People with gum disease, worn enamel, exposed roots, or lots of tooth sensitivity should be careful, as whitening can aggravate these.
Whitening also does not work on dental work like crowns, veneers, or fillings, which keep their original color. So if you have visible dental work in your smile, whitening the surrounding natural teeth can create a color mismatch. In these cases, talk to a dentist about your options before spending on the best at home teeth whitening kits, so you get an even, natural result.
Maintaining your results
Whitening is not permanent, so keeping your smile bright takes upkeep. After finishing one of the best at home teeth whitening kits, protect your results with these habits:
- Cut back on coffee, tea, red wine, and other staining foods, or rinse after
- Use a straw for dark drinks to limit contact with your teeth
- Brush and floss consistently to prevent new stains
- Use a whitening toothpaste for gentle maintenance
- Do occasional touch-ups with a pen or strips as needed
With a little maintenance, your results can last for months before you need another full treatment.
At-home kits versus professional whitening
It helps to understand the trade-offs between whitening at home and going to a dentist. At-home kits cost far less, offer convenience, and let you whiten on your own schedule. The results are gradual and effective for surface stains, which covers most everyday discoloration. The downside is that they are less powerful and slower than professional treatments.
Professional whitening, by contrast, uses stronger, carefully controlled bleaching agents and often delivers faster, more dramatic results in a single visit. A dentist can also protect your gums, address sensitivity, and tackle deep or stubborn stains that home products cannot. The trade-off is cost, since in-office treatments run much higher than a kit.
For many people, the smart approach is to start with a home kit for everyday brightening and turn to a professional only if you want faster or more dramatic results, or if home whitening does not do the job. The two approaches can also work together, with a professional treatment for the big change and home touch-ups to maintain it over time.
The bottom line
A brighter smile is well within reach at home, as long as you choose wisely. The best at home teeth whitening kits use proven bleaching agents like hydrogen or carbamide peroxide, carry dental credentials, and fit a routine you will actually follow. LED tray kits and quality strips offer the best mix of results and value, while pens handle touch-ups. Whiten gradually, manage sensitivity, start with clean and healthy teeth, and see a dentist for deep stains or dental issues. Do that, and you can enjoy a noticeably brighter smile without the professional price tag.
Key Takeaways
- The best at home teeth whitening kits work through bleaching agents like hydrogen peroxide or carbamide peroxide that break down stains.
- LED tray kits and whitening strips offer the best balance of effectiveness and value, while pens are best for touch-ups.
- Look for a proven active ingredient, dental endorsement, sensitivity features, and a routine you can stick to.
- Do not assume a higher price or brighter ad photos mean better results; the active ingredient and safety credentials matter most.
- Whiten safely by following instructions exactly, not overusing kits, starting with clean teeth, and avoiding staining foods during treatment.
- Manage sensitivity with a sensitive-teeth toothpaste, rest days, and a lower peroxide concentration if needed.
- Start with clean, healthy teeth by removing plaque and treating any dental issues first, and see a dentist for deep stains.