
How to Frost a Cake: A Step-by-Step Guide to Smooth Results
The gap between a home-frosted cake and a bakery one usually comes down to two or three techniques that nobody mentions in the recipe. Crumbs dragging through the frosting, layers sliding sideways, a surface that will not go smooth no matter how much you fuss at it: all of these have specific, simple fixes. Once you know them, frosting stops being the stressful part of baking and becomes genuinely satisfying. Here is a step-by-step guide on how to frost a cake properly.
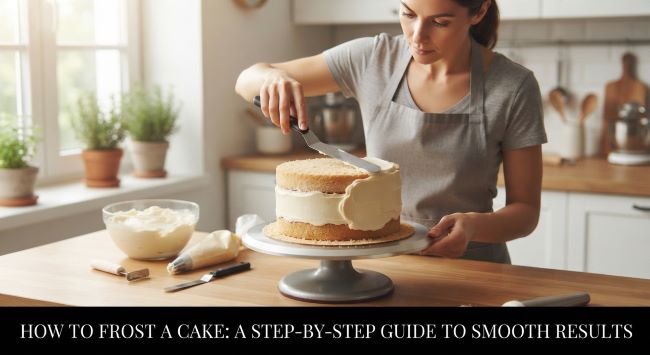
What You Need
The tools make a substantial difference in how to frost a cake, though the list is short:
- An offset spatula, the most useful tool, with its angled blade letting you spread frosting without your hand touching the cake.
- A bench scraper or icing smoother, for flat, even sides.
- A turntable, not essential but transformative, letting you rotate the cake while your hand stays still.
- A serrated knife for leveling, and a cake board or flat plate to work on.
- Plenty of frosting, since running short partway through is the most frustrating way to fail. Most recipes underestimate.
Start With a Cooled Cake
The first rule of how to frost a cake is non-negotiable: the cake must be completely cool. Frosting a warm cake makes it melt and slide off, and produces far more crumbs. Better still, chill the layers, since cold cake is firmer, produces dramatically fewer crumbs, and handles without breaking. Wrapping and refrigerating layers for at least an hour makes everything easier.
Level the Layers
An early step in how to frost a cake is leveling, since cakes dome as they bake and stacking domed layers produces a lopsided result. Use a long serrated knife to slice off each dome, keeping the blade horizontal and rotating the cake as you cut rather than sawing through. A cake leveler does the same job with less skill required, and eating the offcuts is a genuine perk.
Fill and Stack
With level layers, the next stage in how to frost a cake is assembly:
- Place a dab of frosting on the board to anchor the bottom layer and stop it sliding.
- Set the first layer down, ideally cut side up.
- Spread an even layer of frosting across the top, going right to the edge. Use more than feels necessary, since a thin filling layer looks mean when sliced.
- Add the next layer, pressing gently and checking it sits level.
- Repeat for remaining layers, placing the final layer cut side down so the flat original bottom becomes the top surface.
For softer fillings like jam or curd, pipe a ring of firm frosting around each layer’s edge as a dam, then fill the center, which stops filling oozing out under the weight above.
The Crumb Coat: The Key Step
If one technique separates good results from frustrating ones in how to frost a cake, it is the crumb coat: a thin preliminary layer whose only job is trapping loose crumbs.
Spread it thinly over the entire cake, top and sides. It will look messy and streaked, which is exactly correct. Then chill for at least 20 to 30 minutes until firm to the touch, locking the crumbs in place so the final layer goes on clean.
Skipping this is the single most common reason home-frosted cakes show crumbs throughout the surface, and it is why bakery cakes look so clean.
The Final Coat
Once the crumb coat is set, the final stage of how to frost a cake produces the finish:
- Apply a generous amount of frosting to the top, more than you need, and spread it outward from the center.
- Push the excess over the edges rather than trying to frost the sides separately.
- Work frosting onto the sides, adding more where needed and building up an even thickness.
- Hold your scraper or spatula vertically against the side, keeping it still while rotating the turntable, which produces smooth sides far more effectively than moving your hand around the cake.
- Clean the scraper between passes, since accumulated frosting drags and creates ridges.
- Finish the top edge by pulling the raised rim of frosting inward toward the center with your spatula.
Several light passes produce a better surface than one aggressive attempt.
Getting a Smooth Finish
Warming your spatula in hot water and drying it before a final pass helps frosting glide, and chilling between coats firms everything up. Accepting a deliberate texture, such as swirls or rustic swoops, is a legitimate alternative to fighting for a mirror finish, and often looks better than an almost-smooth surface.
Common Problems and Fixes
| Problem | Cause | Fix |
|---|---|---|
| Crumbs in frosting | No crumb coat | Chill, crumb coat, chill again |
| Frosting sliding | Cake too warm | Chill everything thoroughly |
| Layers uneven | Domed tops | Level with a serrated knife |
| Frosting too stiff | Cold or thick | Beat briefly, add a splash of milk |
| Frosting too soft | Warm kitchen | Chill it, then re-whip |
| Filling squeezing out | No dam | Pipe a frosting ring around the edge |
Most frosting problems trace back to temperature, either the cake being too warm or the frosting being at the wrong consistency, so those are the first things to check.
Tips for Better Results
Work in a cool kitchen where possible, since heat is the enemy at every stage. Tuck parchment strips under the cake edges to keep the board clean. Do not rush the chilling steps, and remember that a slightly imperfect cake that tastes excellent is a complete success.
The bottom line on how to frost a cake is that professional results come from a few specific steps rather than natural talent. Start with a completely cool or chilled cake, level the domed tops, stack with generous filling using a frosting dam for soft fillings, then apply a thin crumb coat and chill until firm. Add the final coat generously, smooth the sides by holding your scraper still while rotating the cake, and clean the tool between passes. Keep everything cool, be patient with the chilling steps, and embrace a textured finish if a mirror-smooth one is not cooperating.
Key Takeaways
- An offset spatula, bench scraper, turntable, and serrated knife make the process dramatically easier.
- Make more frosting than the recipe suggests, since running short partway through is the worst outcome.
- The cake must be completely cool, and chilled layers produce far fewer crumbs and handle better.
- Level domed tops with a serrated knife so layers stack evenly rather than lopsided.
- Anchor the bottom layer with a dab of frosting, and use generous filling between layers.
- Pipe a ring of firm frosting as a dam before adding soft fillings like jam or curd.
- The crumb coat is the key step: a thin layer that traps crumbs, then chill 20 to 30 minutes until firm.
- For the final coat, push frosting from the top over the edges, then smooth by holding the scraper still and rotating the cake.
- Warm your spatula in hot water and dry it for a smoother finish, and clean the scraper between passes.
- Most problems come from temperature, so chill the cake and check frosting consistency first.