You always see inspiration posts in blogs like 45 free fonts,50 website layouts,70 logo design tutuorials etc…..
Of course no need to say but it is really hard to decide and find the sources of your contents and it really takes time for all of us.I have an advantage of being a full time blogger which spend 10 hours of a day in front my computer and made ready 15 unique posts ready up until now which are all waiting to be published:)
Anyway,today i want to tell you how i put all the screenshots and the links in a post in about 10 minutes.
Step 1.
Assuming that you saved all the screenshots in a folder by marking the image file names with numbers like photoshop logo tutorial_1,png,photoshop logo tutorial_2.png...etc..
When you find the source ,copy all the URL in Notepad,again putting numbers in front of them.(same screenshot number with same URL.)
Step 2.
Now we will insert all the screenshots and URLs.
To do this we need a wordpress plugin to insert all the images with a few clicks.Faster Image Insert Plugin is a really great plugin which you can insert all the images in your post with one click.
Download the plugin and activate it.
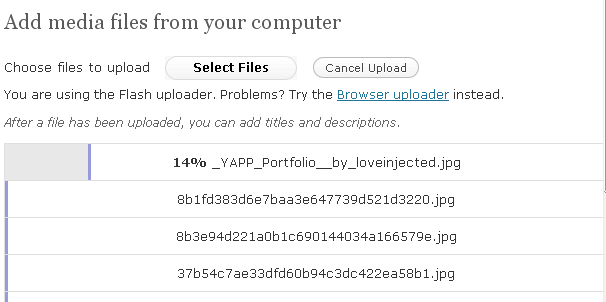
Select all the images in your folder and start uploading.Uploading time depends on your server and your internet connection speed.

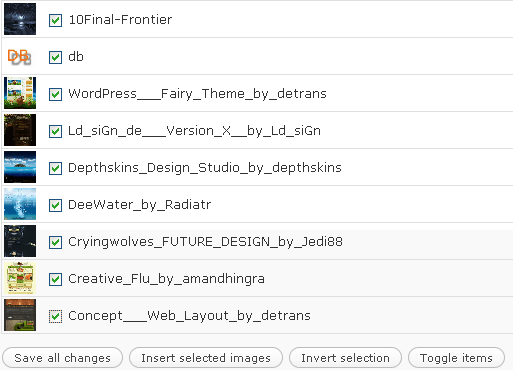
After all the images are uploaded,click on the Media Library or Gallery and you will the see the uploaded images.Now put a tick to all the images and hit Insert selected Images.

All your images are inserted in your post.
Step 3.
According to your wordpress template you may need to adjust the width or height of your images from the HTML Section of the post.
Depending on your choice leave blanks between your images and write the titles of each image source and insert the links as you copied in Notepad(same image number with same link number)
That’s all.:)


great post.
thanks.
Not only a great post, but a great blog. Thanks for your efforts.
Hmmmmm…It is helpful and great post too…..Thanks for teaching us……….!
🙂
This is such a special resource that you are rendering and you give it away for free. I enjoy seeing internet sites that understand the value of providing a supreme resource for free. I truly enjoyed reading your post. Thanks!