

Creating realistic looking clouds in Photoshop can be a challenge, even for experienced designers. But with the right technique and the proper tools at your fingertips, you can craft believable three-dimensional skies that make all of your designs reach new heights. In this blog post, we’ll walk you through the best way to create stunning clouds in Adobe Photoshop. So if you’re making a specific creative image in Photoshop which need clouds, or just looking to sharpen your design skills, keep reading!
What is the best way of creating clouds?
When it comes to creating clouds in Photoshop, there is no one-size-fits-all approach. While some photographic effects will render clouds realistically, for artwork within a fantastical setting, you may want to consider taking a more abstract approach and strategically blending colors and shapes together with one of these free photoshop brushes.
Reasons You Need to Know about how to create clouds in Photoshop
When you know the essentials of Photoshop it’s a matter of learning as much as you can by different kind of tutorials, if you like photo montage. The sky is the limit.
Fully mastering the clouds effect in Photoshop can take some practice, but once you get the hang of creating clouds it can become a highly valuable skill in your arsenal of deployable techniques.
Let me break it down for you why you need to know how to add clouds realistically.
1. To Add realism to Your Images
If you want your images to look as realistic as possible, then you need to know how to create clouds in Photoshop. By adding clouds to your images, you can make them look like they were taken on a bright, sunny day. Additionally, clouds can help to add depth and dimension to your photos.
2. To Enhance the Mood of Your Images
In addition to adding realism, clouds can also help to enhance the mood of your images. For example, if you want to create a feeling of calm and serenity, then you would likely want to add some light, fluffy clouds to your image. On the other hand, if you want to create a feeling of drama or suspense, then you would likely want to add some dark, menacing-looking clouds. It will change the look of the entire sky.
3. To Improve Your Editing Skills
One of the primary reasons you need to know how to create clouds in Photoshop is to improve your editing skills. Photoshop is a powerful editing tool that can help you to make a variety of changes to your photos. However, it can be difficult to know how to use all of its features. Learning how to create clouds in Photoshop can help you to better understand how the software works and how to use it to its full potential.
Making cloud effects can be tricky, and cloud brushes are a popular choice to help you get the look you want. However, a cloud brush tool isn’t always the best solution. By taking a step-by-step approach, you can quickly learn how to add clouds without relying on cloud brushes. It might take some practice and experimentation before you find your ideal cloud effect, but with patience and perseverance, you can craft beautiful clouds that fit your project perfectly.
Step-by-Step Instructions to create clouds in the best way

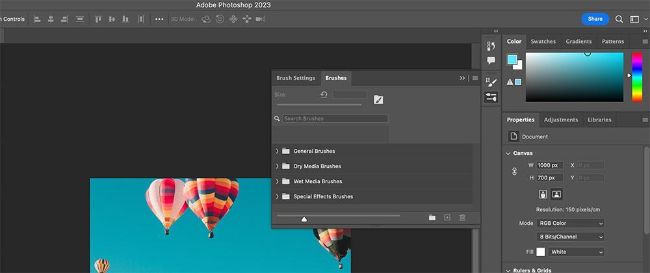
Open up your Photoshop and let’s dive into this tutorial!
The first step is to find an existing image of a blue sky that you would like as the background layer. Be sure to select something you find aesthetically pleasing, as it will form the foundation for the sky effect you’ll be creating. Usually I get my pictures from Unsplash.com. Once you have selected your sky image, you can move on to the next step in this tutorial: adding those dreamy clouds.

STEP 1 – Create your own brush
- Open the brush settings and go to ‘General Brushes’.
- Choose the soft round brush from the brush palette.
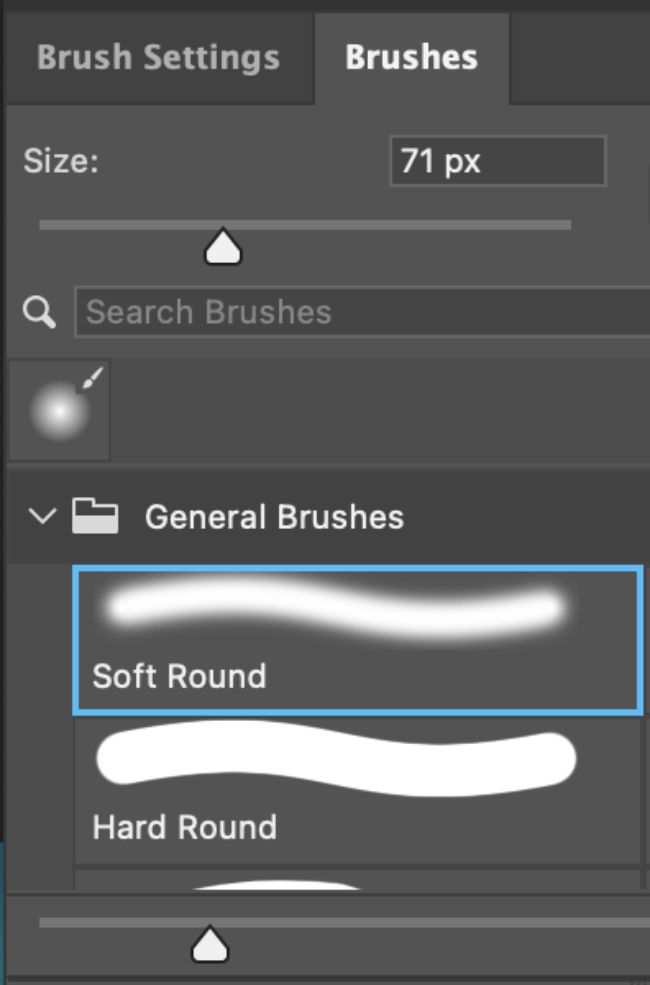
- Go to the brush settings and use this (more or less) for your brush preset regarding ‘Shape Dynamics’ and ‘Scattering’. You can play a bit with the brush tip shape but to start, these are good brush settings.
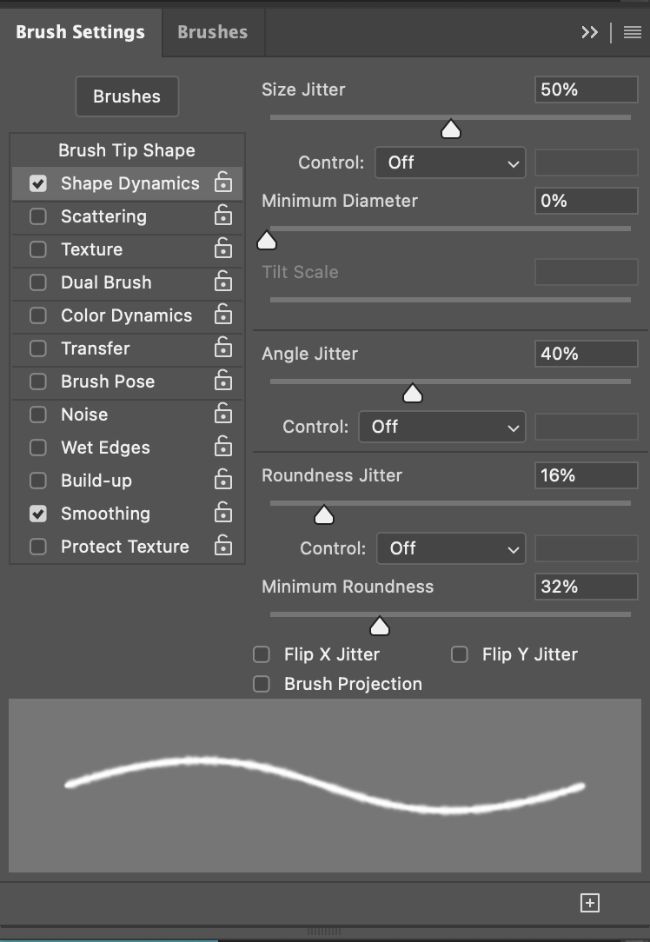

- Save your brush as ‘Cloud Brush’
You can already use it and create clouds in photoshop BUT shall we add some more fun to it?!
STEP 2 – Make cloudy letters and combine it with the cloud brush
- Make a type layer and place your text in black.

- Right-click on the layer and ‘rasterize type’.

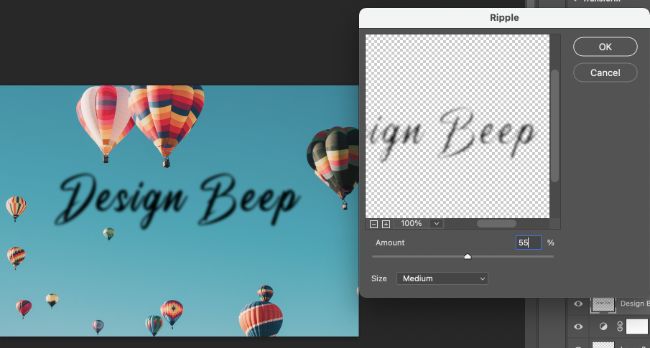
- The next step is to go to Gaussian Blur and set the Radius to more or less 3.5 pixels.
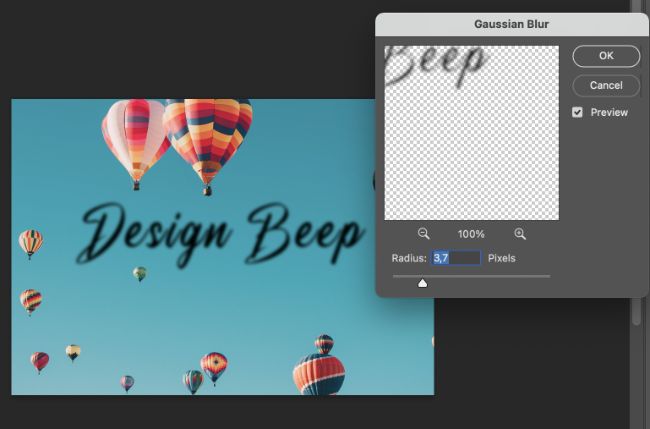
- Then you go to ‘Ripple’ (Filter > Distort > Ripple) and set it to around 55%.
- Make a new layer.
- Take your cloud brush that we’ve created in STEP 1. Make it the same black colour (at 35%) as the text and trace the text with your brush tool.

-
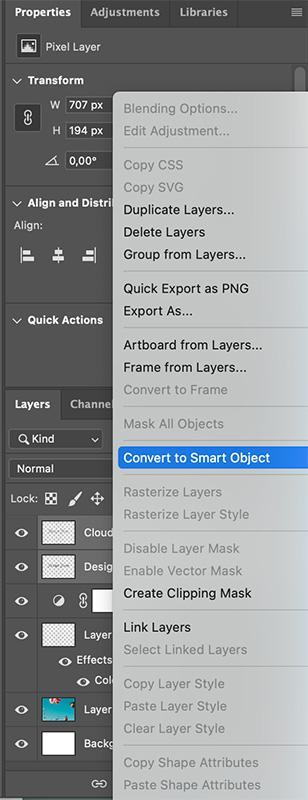
Select the text layer and your cloud trace layer
- Right-click and convert to ‘Smart Object’.
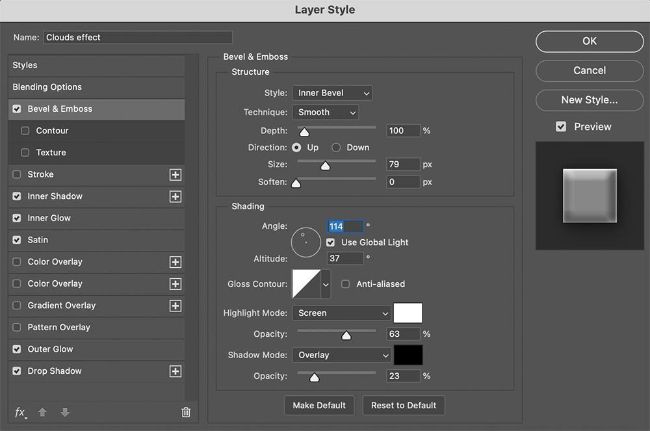
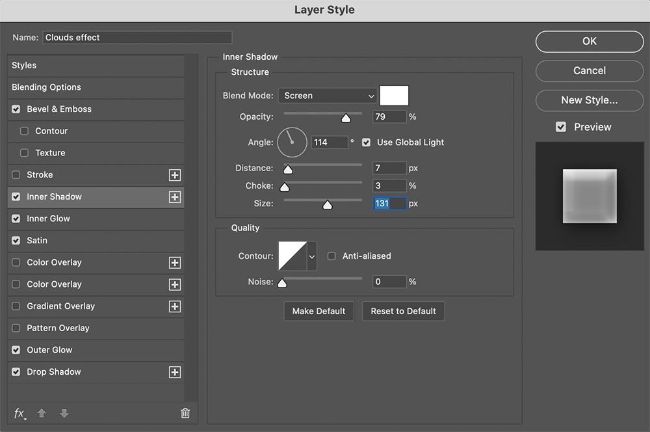
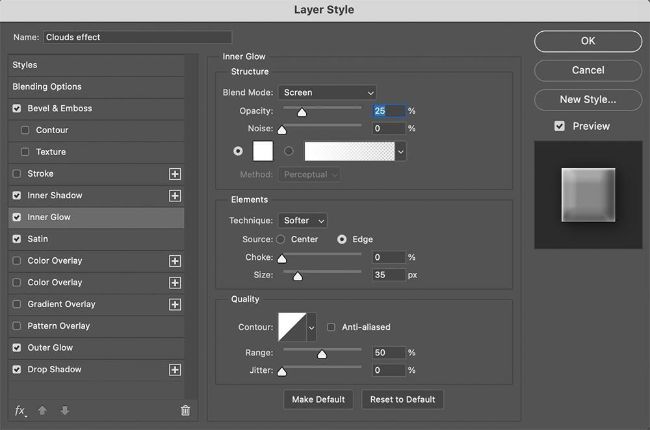
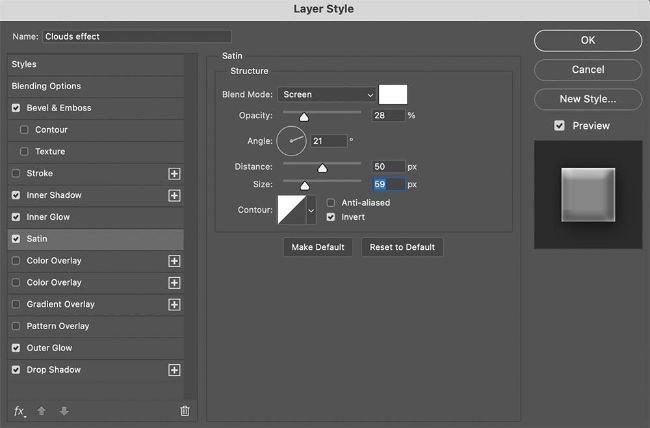
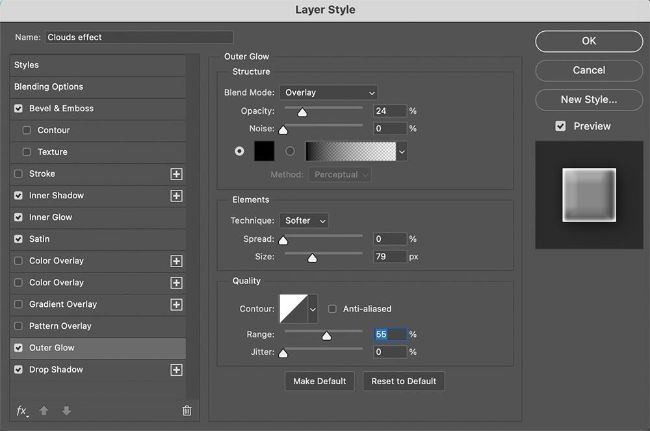
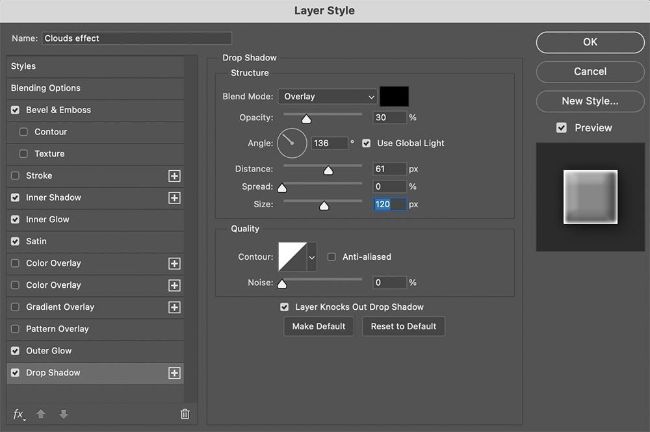
- Go to your ‘Smart Object’ and right-click. Go to blending options. See in the screen shots below what I’ve used as blending options.
Bevel & Emboss
Inner Shadow
Inner glow
Satin
Outer Glow
Drop Shadow
STEP 3 – Make a cloud layer mask
- Create a new layer.
- Set your front colour to white and the back layer to black.
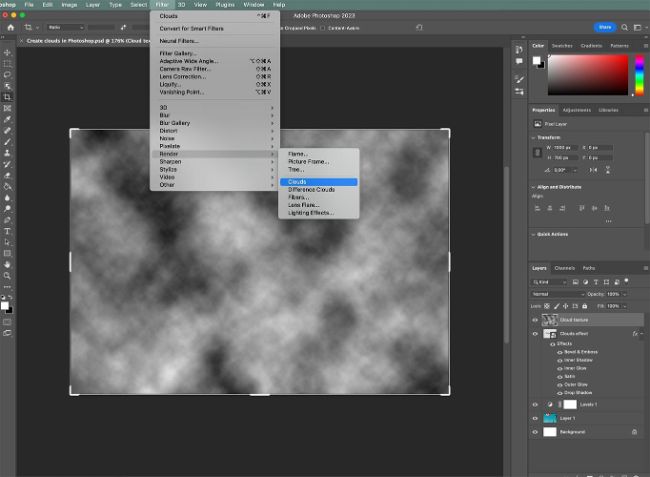
- Go to ‘Filter’ then ‘Render’ then ‘Clouds.
- Duplicate this layer and give it another name.
- Hide the first cloud layer for now.
- Right-click on the only visible clouds layer and ‘Create Clipping Mask’.
- Set the blend mode to ‘Lighter color’.
In the image > adjustment > layers you can always adjust it.
- Make the top cloud layer visible again and put the blend mode to ‘Screen’.
- Adjust the brightness and the contrast with the levels adjustment.

- One of the last steps is to erase some clouds where you don’t need them. See the following screenshot of the setting that you need to choose. When it’s set, you can erase what you don’t need with the black brush tool. In case you’ve erased too much, you can switch to the white brush tool and get the clouds back.
- The very last thing I did is manually add clouds at the beginning and end of the text with the cloud brush I made in the beginning.
Wrapping up and my experience with creating clouds in photoshop
It seems like a long tutorial but it doesn’t take long to actually make these clouds in photoshop. It definitely will help you to create amazing images. We hope you’ve learned about the different ways to make and add clouds and that you are as enthusiastic as us about Photoshop and all it’s possibilities!
Author Bio:
Inge Waterschoot is the CEO of sharonandinge.com. She is a creative powerhouse, always brainstorming new ideas to keep her businesses moving forward. She loves snowboarding, yoga, and any beach sport – anything that allows her to be active and enjoy the outdoors.
She likes to think of herself as a bit of a thrill seeker, always looking for the next great adventure.


")
")