

Web designers and other online professionals constantly have challenges to meet and problems to solve. They naturally look for tools that can make their work easier and their products better.
Their projects sometimes rely heavily on using images. In most instances, they use stock images, or images supplied by clients. Some designers are adept at creating their own carefully edited images, and others aspire to be able to do so someday.
If this sounds like your situation, you’re a Mac user, and you would like to be able to work magic with photographs, you sometimes face a problem. As with many new applications, the problem is one of complexity. You don’t always have the time to learn how to become as proficient with a new tool as you would like. There is, however, some good news.
The good news is Luminar; a hot new photo editor for Mac that adjusts to your skill level:.
– You can use this photo editor for creative photography projects.
– Use it to score points with your blog audiences by branding yourself as a pro.
– Creating fresh, attractive images in support of marketing campaigns is never a problem with Luminar.
Luminar – The World’s 1st Photo Editing App that Adapts to You
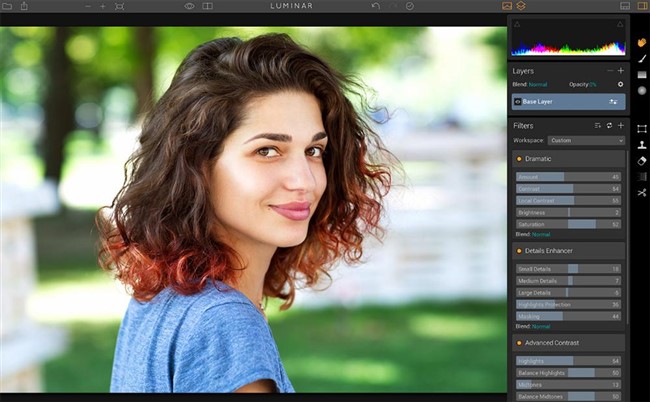
One of the most exciting features of this Mac photo editor is how its UI acts to transform a highly complex app into an image editor that can function in accordance with your style and specific skill level. The following “tutorial” will give you an idea of just how easy using Luminar can be. To get a better idea of Luminar’s benefits and advantages, check out this features comparison chart of Luminar vs. Aperture vs. Lightroom.
Cropping Images
It’s surprisingly simple to crop an image in Luminar. Click the crop tool icon, pick the crop mode, and click apply. That’s all there is to it. You can also adjust image size, rotate it, and fix imperfections.
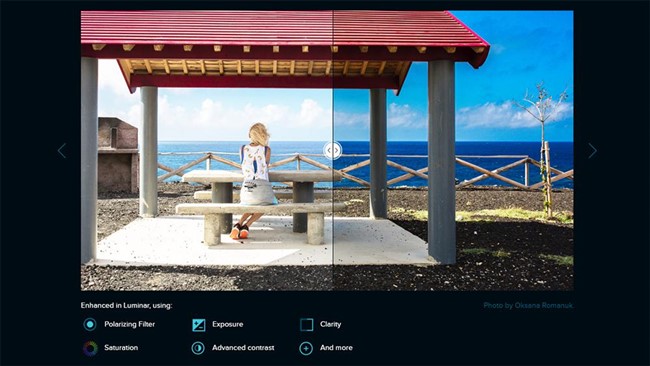
 Easily crop and enhance images; no matter your skill level.
Clone Stamp Tool
Using Clone Stamp tool for cloning an area of an image is also a simple task. Just select a source point, and while holding the “Option” button, click on the area you wish to clone and release the “Option” button. Click and paint over another area and you can preview the image being cloned. If you’re happy with the result, click “Apply”. Again, a relatively complex function becomes a simple task.
Time to Really Get Creative
The following Luminar features will definitely put your creative juices to good use. There are other features of course, but you’ll find you can accomplish some amazing things with these three: the texture overlay filter, the dramatic filter, and the color temperature filter.
These three videos demonstrate how these features can be applied:
The Texture Overlay Filter Feature
Working with the texture overlay filter can be a delightful experience; Add the right texture, and you can give an image a vintage, grungy, or uniquely creative look. It’s simply a matter of selecting the filter, choosing the texture you want, and working the lightness/darkness as shown in the video. There are other options as well.
The Dramatic Filter Feature
As this video demonstrates, the dramatic filter feature makes Luminar is an image editor Mac users love to work with. As an example, the video shows that, by increasing contrast, while lowering the saturation level, photos can take on a gritty, urban look. It’s merely a matter of choosing “Dramatic” from the filter menu and dragging the slider buttons until you get the look you want.
The Color Temperature Filter
If you want to cool an image (by giving it a blue touch), or warm it up (where a red touch will do), the color temperature filter is the feature of choice. As is the case with the other two filters, and as shown in the video, it’s just a matter of selecting “Color Temperature” from the filter menu, and adjusting the temperature and tint slider buttons until you have what you want. Once again; like most other features in this Mac image editor, this one is straightforward and simple to work with.
5 Features Unique to Luminar
Luminar can be used as a standalone application, as a Photos extension, or as a plugin for Photoshop, Lightroom, or Aperture. Its use is currently limited to Mac users; but it will soon be available to PC users.
 If your Mac is missing this hip photo app, maybe it’s time to fix the problem.
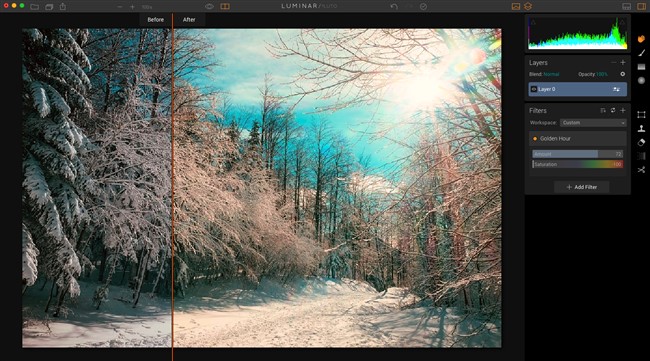
1. Golden Hour Feature – This filter emulates or intensifies soft tones associated with sunrise and sunset. These tones often appear washed out. Two sliders are used to restore or enhance these tones.
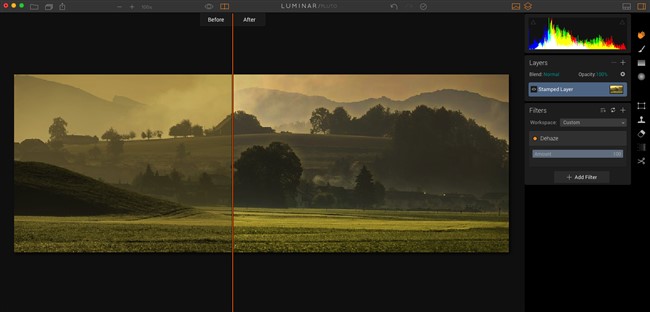
2. DeHaze Feature – The DeHaze filter is used to cut through haze or fog, and bring out details that are barely noticeable. A single slider achieves the desired result.
3. Workspaces – Workspaces is a cool shortcut that streamlines your workflow and save search time by creating subsets of filters commonly used with given image types (B&W, landscape, etc.).
4. Split Color Warmth Feature – Two sliders, warm colors and cool colors, make up this useful feature. Dragging to the right increases color warmth, and dragging to the left gives a color a cooler hue. This filter can be used to increase vibrancy or to do some creative toning.
5. Split Toning Feature – By selecting the split toning filter, you can apply separate colors to highlighted regions of a photo or to shadowy regions in the photo. There are two sliders for each region type; a hue slider and a saturation slider. The “Amount” slider can be used to increase intensity.
There’s a wealth of other useful features as well, but the best way to find out more about Luminar, is to take it for a test spin.


