
This Adobe Illustrator tutorial will teach you how to make your own button logo using pre-generate gloss and chrome effects. With this tutorial, you will learn a quick and easy method to design logos and other web graphics using arcing gradients and shapes.
Step 1 – Button surface
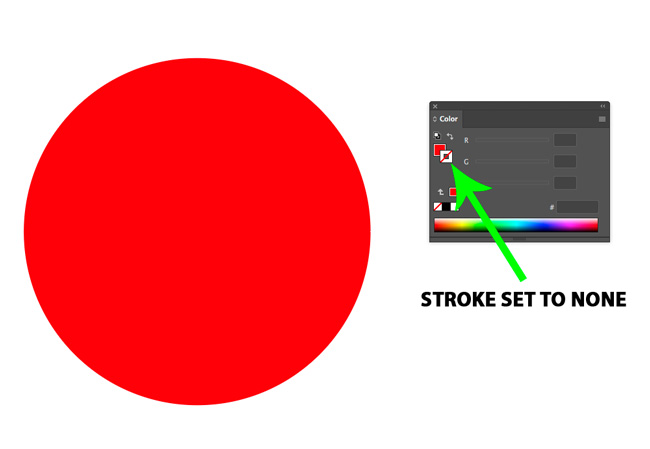
First, we will want to create the button’s surface. To do this, go to the Tool menu and select the Ellipse Tool or click (L) on your keyboard. While holding the Shift key, click and drag the mouse to draw a perfect circle.
Next, while the circle is still selected, choose a red color for your button form the Color or Swatches Panel. Make sure you have the Stroke option set to none.
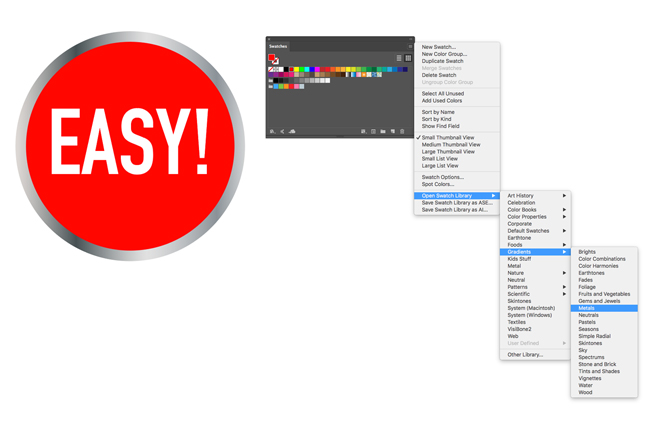
Next, using the Text Tool, write out your logo’s text you want to use within the red.
Tip: Single words such as “Easy” or “Yes” work best for visual clarity, although other text or designs may also work well. Experiment after you have completed the project to see what works.
Step 2 – Chrome Base
Next, we will create the chrome base for the button. Select the circle you have already created with the Black Selection tool, then go to Edit > Copy. Now we will past it in place, behind the original by going to the Edit menu and selecting Paste in Back.
Next, while the second circle is still selected, hold down the Alt (Option) Key on your keyboard, then scroll the mouse wheel to scale the size to be slightly larger than the original circle.
Next, apply a chrome gradient to the newly created circle. You can find this in the Swatches Panel under Gradient in the Metal section.
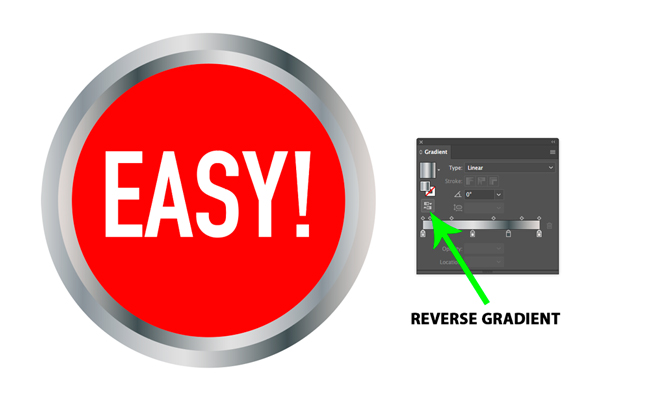
After this is applied, select the chrome gradient layered in your layers panel, go to Edit > Copy then Edit > Past in Back. Now you should have two gradient layers in your layers panel.

Select the second gradient circle with the Black Selection tool then scale its size to slightly larger than the previous gradient circle while holding the Alt (Option) key on your keyboard. Once the second gradient circle is in place, adjust their direction to match the example below, by going to the Gradient panel and selecting the Reverse Gradient option.
Step 3 – Shading the button
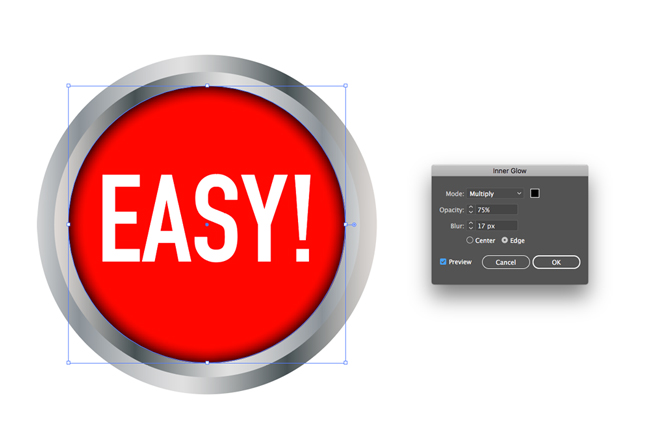
First, select the red circle, then go to Effect menu > Stylize, then Inner Glow, change the color to Black.
Turn on preview mode to watch the changes in real time for the next part. You will want to next adjust your blend mode to multiply, and tweak blurring as necessary to get it looking right.
Next, we are going to select the red circle and copy it by going to Edit > Copy, then paste it in place in front of the original by going to the Edit > Paste in Front.
While the copy is still selected, hold down the Alt (Option) Key, then scroll the mouse wheel to scale the size to be slightly smaller than the original circle.
Finally, with the newest circle still selected, go to the Appearance panel, and remove the Inner Glow.
Step 4 – Adding further shading to the chrome base
Now, select the Arc Tool from the Tools menu and create an arc that divides our button in half like so.
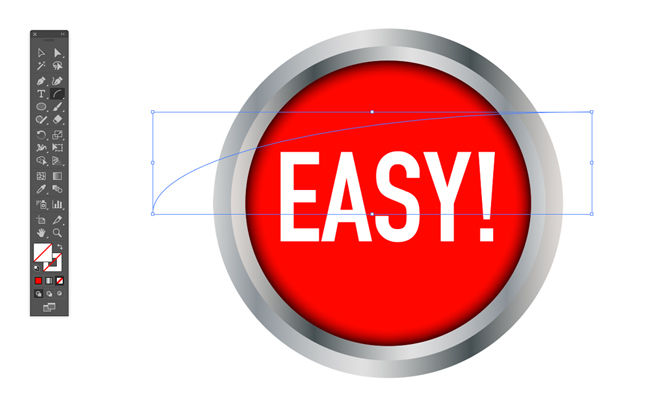
We will be using the same arc twice during logo button design, so while the arc is already selected, go to the Edit menu and select Copy, for later use.
Now hold the shift key to select the arc as well as the two chrome circles with the Black Selection Tool. Go to the Window > Pathfinder, then select Divide.

This will turn the two chrome circles into four objects that have been divided by our arc as well as bring these objects to the foreground.
Next, select the bottom half of the first chrome circle and using the Gradient Panel, reverse the direction of the gradient to create the mirroring effect.

Now, select all chrome circles with the Black Selection Tool and send them to back by Right Clicking > Arrange, then choose Send to Back. After this step, your logo should look like the below screenshot:

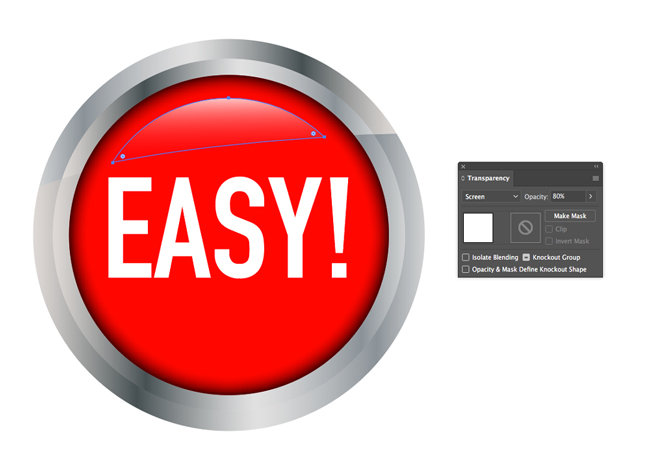
Step 5 – Adding gloss to the button face
To do this, you will need to first select the innermost circle that in the Gradients panel enter the below settings.

Now press Control + F on the keyboard to paste the arc on top of it in the same position as the last step.
Hold the shift key to select the circle and arc together, open the Pathfinder panel and select Divide like we did in step 4.
Next, using the direct selection tool click anywhere on the art board to deselect, reselect the lower half of our now divided circle, and remove it by pressing the Delete (Backspace) key on your keyboard.
Though our keyboard backspace actually stopped working during this and we found this super handy guide on how to fix your backspace key issues. Anyway back to the guide.
Next, select the remaining upper portion of the circle, press the (G) key on our keyboard to select the Gradient tool, then adjust the angle and depth of the gradient to match your lights sources direction.
Finally, go Window > Transparency to open the panel, select the Transparency option and change it to Screen, then reduce opacity at this point for further realism.
It’s That Easy!
Past this, it’s up to you what you want to do with this project. Additional filters or gradient effects, masking options and other effects are yours to add to your newly created “easy Button”.

