
How to Read a Tape Measure: A Clear Beginner’s Guide
A tape measure looks simple until you actually need a precise number, at which point all those unlabeled lines of varying length suddenly become a puzzle. Is that mark a quarter inch or three-eighths? Why does the metal hook wobble? Most people muddle through by eyeballing it, which is fine until a shelf ends up crooked or a piece of trim comes back an inch short. The good news is that the system is entirely logical once someone explains it, and it takes about five minutes to learn properly. Here is a clear guide on how to read a tape measure.
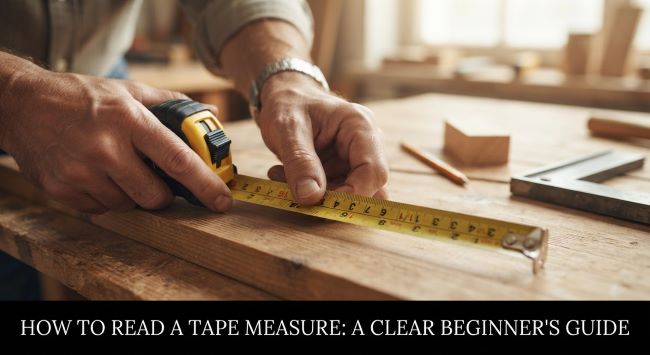
Understanding the Inch Markings
The core of how to read a tape measure is understanding that each inch is divided by a system of progressively shorter lines. On a standard imperial tape:
- The longest lines with numbers mark whole inches.
- The next longest line, exactly halfway between inches, is the half inch.
- The next size down marks the quarter inches, at 1/4 and 3/4.
- Shorter lines still mark eighths, at 1/8, 3/8, 5/8, and 7/8.
- The shortest lines mark sixteenths, the finest division on most tapes.
The elegance of the system is that line length tells you the fraction. Once you internalize that longer means a larger fraction, reading becomes automatic rather than requiring you to count tiny marks.
Counting the Sixteenths
The practical method for how to read a tape measure precisely is counting in sixteenths, since that is the smallest division. Each inch contains sixteen of the smallest marks.
To read a measurement, note the last whole inch you passed, then count the small marks past it. If you land on the fifth small mark past the 4-inch line, you have 5/16, giving 4 and 5/16 inches.
The one step that trips people up is reducing fractions. Measurements are conventionally expressed in their simplest form, so 8/16 becomes 1/2, 4/16 becomes 1/4, 12/16 becomes 3/4, and 2/16 becomes 1/8. Counting in sixteenths and then simplifying is far more reliable than trying to identify each mark by its length alone.
The Hook Is Supposed to Move
A detail that confuses nearly everyone learning how to read a tape measure is the loose metal hook at the end. It slides back and forth slightly, and it is not broken.
That movement is deliberate, calibrated precisely to the thickness of the hook itself. Hook the tape over a board edge and pull, and it slides out to compensate. Push it against a surface for an inside measurement and it slides in. Either way the measurement stays accurate, so never try to tighten it.
The Special Markings
Most tapes include markings that puzzle people until explained, and they are a useful part of how to read a tape measure:
Black diamonds appear roughly every 19.2 inches, marking eight equal divisions of a 96-inch sheet for certain framing layouts.
Red or highlighted marks typically appear every 16 inches, indicating standard stud spacing, which is enormously useful for hanging anything on a wall.
The case length is often printed on the housing. For inside measurements, butt the case against one side and add that length to your reading.
The Metric Side
Many tapes carry metric on the opposite edge, and it is considerably simpler. Centimeters are numbered, each subdivided into ten equal millimeters, with the 5-millimeter halfway mark often slightly longer. There are no fractions to reduce, so anyone finding imperial frustrating may work substantially faster in metric.
Practical Measuring Tips
Knowing how to read a tape measure is only half the job; using it well is the other half:
- Keep the tape straight, since a sagging or angled tape reads long.
- Hook or butt firmly so the end is genuinely at the edge of what you are measuring.
- Read straight on, since looking at an angle causes parallax error and misreadings.
- Measure twice, cut once, the oldest advice in the trade and still the best.
- Mark with a V rather than a line, since the point of the V identifies the exact spot precisely.
- Lock the tape before pulling it away from the work when possible.
- Use the same tape throughout a project, since cheap tapes can vary slightly.
Common Mistakes
A few errors recur constantly among people learning how to read a tape measure. Misreading eighths as quarters is the most frequent, and counting in sixteenths solves it. Forgetting the case length on inside measurements produces errors of several inches. Reading the wrong side of the tape causes chaos, and letting it sag consistently produces measurements that run long.
Putting It Into Practice
Once you can confidently read a tape measure, the practical applications are immediate, and one of the most common is planning a room. Measuring a space accurately before buying furniture prevents the expensive and frustrating discovery that a sofa will not fit through the door or that a table leaves no room to walk around it. The guidance in How to Measure a Room for Furniture covers that process in detail, which pairs naturally with this since accurate tape reading is the underlying skill that makes room measurement reliable, and the two together will save you from a great many costly mistakes.
The bottom line on how to read a tape measure is that the system is entirely logical once you understand that line length indicates fraction size: longest for inches, then halves, quarters, eighths, and sixteenths. Count the small marks in sixteenths past the last whole inch and simplify the fraction, remember that the loose hook is deliberately calibrated rather than broken, add the case length for inside measurements, and use the red 16-inch stud markings when working on walls. Keep the tape straight, read straight on, mark with a V, and measure twice before you cut.
Key Takeaways
- On an imperial tape, line length indicates the fraction: longest for whole inches, then halves, quarters, eighths, and sixteenths.
- The most reliable method is counting the smallest marks in sixteenths past the last whole inch, then simplifying the fraction.
- Simplify as you go, since 8/16 is 1/2, 4/16 is 1/4, 12/16 is 3/4, and 2/16 is 1/8.
- The loose metal hook at the end is deliberately calibrated to compensate for its own thickness, not broken.
- Black diamonds appear every 19.2 inches for certain framing layouts, and red marks every 16 inches for stud spacing.
- For inside measurements, butt the case against one side and add the printed case length to your reading.
- The metric side is simpler, with centimeters subdivided into ten equal millimeters and no fractions to reduce.
- Keep the tape straight, read straight on to avoid parallax error, and mark with a V rather than a line.
- Common mistakes include confusing eighths with quarters, forgetting the case length, and letting the tape sag.
- Accurate tape reading is the foundation for practical tasks like measuring a room before buying furniture.