How to Fix Broken Zipper Pull
The little tab snaps off, and suddenly your favorite jacket, backpack, or pair of boots is a struggle to open. You pinch the tiny slider with your fingernails and wonder if the whole item is ruined. It is not. Learning how to fix broken zipper pull tabs is one of the easiest repairs you can do at home, and most fixes take under five minutes.
This guide covers quick fixes with items you already own, permanent replacement options, and what to do when the slider itself has failed. A few tables help you choose the right method and the right part.
First, Know the Parts of a Zipper
A zipper has more parts than most people realize. Naming them makes the repair much easier.
| Part | What It Is |
|---|---|
| Pull tab | The small piece you grip with your fingers |
| Slider | The body that rides along the teeth and joins or parts them |
| Bridge or crown | The loop on top of the slider where the pull tab attaches |
| Teeth or coil | The interlocking elements on each side |
| Tape | The fabric the teeth are attached to |
| Top stops | Small pieces that keep the slider from coming off the top |
| Bottom stop | The piece that keeps the slider from coming off the bottom of a closed-end zipper |
| Pin and box | The parts at the bottom of a separating zipper, as on a jacket |
In everyday talk, “zipper pull” can mean the tab alone or the whole slider. The fix depends on which one broke.
Diagnose the Problem
The right answer to how to fix broken zipper pull damage depends on what failed. Look closely at the slider before you buy anything.
| What You See | What Broke | Best Fix |
|---|---|---|
| Tab is missing, loop on slider is intact | Pull tab only | Attach a new pull to the loop |
| Tab and the loop on the slider both snapped off | Slider bridge | Clip-on repair pull or a new slider |
| Tab is fine, but teeth do not stay closed behind the slider | Worn or stretched slider | Tighten or replace the slider |
| Slider came off one or both sides | Slider off track | Refit the slider and add a stop |
| Teeth are missing or bent | Damaged teeth | Replace the zipper or see a tailor |
| Zipper is stiff or stuck | Dirt or snagged fabric | Clean and lubricate |
Most cases fall into the first two rows. Those are the simplest to solve.
Quick Temporary Fixes
If you are away from home and need to know how to fix broken zipper pull tabs right now, these work with common items. Each one needs the loop on the slider to be intact.
- Paperclip. Thread a small paperclip through the loop. Bend it closed and wrap the end with tape so it does not snag.
- Key ring. A small split ring makes a sturdy, easy-to-grab pull.
- Safety pin. Pass it through the loop and close it. Good in a pinch, though it can pop open.
- Zip tie. Thread a small cable tie through the loop, pull it into a ring, and trim the tail.
- String, cord, or a shoelace. Loop it through and knot it.
- Twist tie. Fold it through the loop and twist. It will not last long, but it gets you through the day.
- Jump ring and charm. A jewelry jump ring with a bead or charm makes a decorative pull.
If the loop itself has broken off, you can sometimes grip the slider body with pliers to move it until you get a proper part.
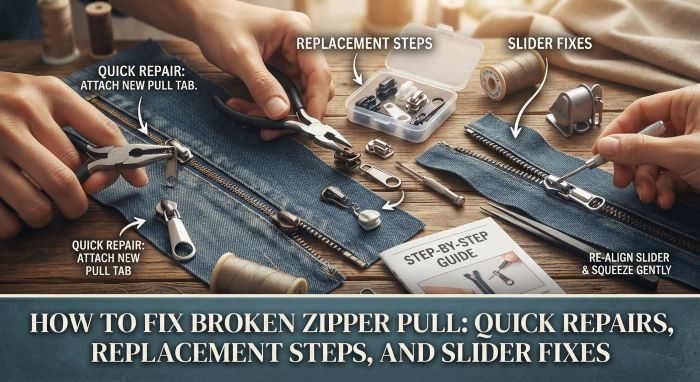
Method 1: Attach a New Pull Tab
When only the tab broke, this is the simplest lasting repair.
Clip-on replacement pulls are sold in packs at fabric stores, outdoor shops, and online. They have a small hinged or spring clip, like a tiny carabiner.
- Open the clip on the new pull.
- Hook it through the loop on the slider.
- Close the clip until it snaps shut.
- Test the zipper.
Some replacement tabs use a small screw or a clamp. Tighten these with a small screwdriver or squeeze them shut with pliers, as the package directs.
Choose a pull that suits the item. A small metal tab suits jeans and dresses. A larger one suits coats and luggage. A zipper pull replacement of this kind costs very little, and a pack of several lets you fix every broken tab in the house.
Method 2: Make a Paracord Pull
A cord pull is strong, light, and easy to grip with gloves. It is a favorite for backpacks, tents, and winter jackets.
- Cut about six to eight inches of paracord or other thin, strong cord.
- Fold it in half and push the folded end through the loop on the slider.
- Pass the two loose ends through the fold and pull tight. This is called a lark’s head knot.
- Tie the two ends together in an overhand knot about an inch from the slider.
- Trim the ends. If the cord is nylon, briefly melt the cut ends with a lighter so they do not fray. Take care with the flame and keep it away from the fabric.
You can slide a short piece of heat shrink tubing or a bead over the cord for a neater grip.
Method 3: Use a Clip-On Repair Pull When the Loop Is Broken
Sometimes the bridge on top of the slider snaps along with the tab. Then there is nothing to hook a new tab onto.
Repair pulls made for this problem clamp around the body of the slider or hook into the small openings on its sides. Follow the directions for your product. In general:
- Open the repair pull’s jaws or clamp.
- Fit it over the top of the slider so its prongs seat in the slider’s body.
- Close and lock it, by hand or with pliers.
- Test the zipper several times.
If the repair pull does not grip well, replace the whole slider. That takes a few more minutes and gives a stronger result.
Method 4: Replace the Slider
A zipper slider replacement solves a broken bridge, a cracked slider, and a zipper that splits open behind the slider. You have two ways to do it.
Option A: A Snap-On Replacement Slider
Products such as FixnZip and ZlideOn are made to go on without removing stops or sewing. They open and clamp onto the teeth.
- Find your zipper size and type (see the guide below).
- Remove the old slider. You may need to cut it off with wire cutters. Protect your eyes, and cut away from the fabric.
- Fit the new slider over the teeth as the instructions show.
- Tighten its thumbscrew or snap it shut.
- Run it up and down to test.
These cost more than a plain slider but need no tools beyond the cutters.
Option B: A Standard Slider
This is the classic repair.
- Get the right slider. Match the size, the tooth type, and the style.
- Remove the top stop. On the side you will slide the old slider off, pry the small metal stop open with needle-nose pliers or end nippers and pull it off. On molded plastic zippers, you may need to snip the stop away carefully.
- Slide the old slider off the top.
- Feed the new slider on. Hold it with the wider, two-channel end facing the tape ends and the pull tab facing out. Push each side of the zipper tape into its channel. Keep the two sides level, and wiggle the slider down until it catches the teeth.
- Test it. Close and open the zipper to check that the teeth mesh evenly.
- Replace the stop. Crimp a new metal top stop onto the tape just above the last tooth. If you do not have one, sew a thick bar of thread, six to eight stitches, across the same spot.
For a jacket zipper that separates, work on the side with the box at the bottom, since the slider lives on that half.
Find the Right Size and Type
Any zipper pull replacement or zipper slider replacement starts with the right part. Turn the old slider over. Most have a number stamped on the back, such as 3, 5, 8, or 10. That number is the size, based on the width of the closed teeth in millimeters.
| Size | Approximate Width of Closed Teeth | Common Uses |
|---|---|---|
| #3 | 3 mm | Dresses, skirts, pouches, pillow covers |
| #4.5 | 4.5 mm | Jeans, light bags |
| #5 | 5 mm | Jackets, hoodies, backpacks |
| #8 | 8 mm | Heavy coats, luggage, boots |
| #10 | 10 mm | Tents, sleeping bags, boat covers |
Letters often follow the number. They show the tooth type.
| Tooth Type | Look | Notes |
|---|---|---|
| Coil, often marked C | Fine nylon spiral | Flexible, common on bags and tents |
| Molded plastic, often marked V or VS | Chunky plastic teeth | Common on jackets and kids’ wear |
| Metal, often marked M or by alloy | Brass, nickel, or aluminum teeth | Common on jeans and leather goods |
A slider must match both the size and the tooth type. A size 5 coil slider will not work on a size 5 metal zipper. Brand matters less, though sliders from the same maker fit best. Many zippers are made by YKK, and the letters are stamped on the pull.
If you find no markings, measure across the closed teeth with a ruler and compare the tooth style with photos on the package.
Fix a Slider That No Longer Closes the Teeth
When the zipper opens up behind the slider, the slider’s jaws have spread with wear.
- Move the slider to the bottom of the zipper.
- Place needle-nose pliers on one side of the slider’s back end, the end that faces the closed teeth.
- Squeeze very gently.
- Do the same on the other side.
- Test the zipper.
- Repeat with a little more pressure if needed.
Go slowly. Too much force will jam or crack the slider. This fix buys time, but a worn slider usually needs to be replaced in the end.
Put a Slider Back on Track
If the slider has come off one side:
- Check the teeth near the bottom for damage.
- Remove the stop at the top of the loose side.
- Feed that side of the tape back into the empty channel of the slider.
- Hold both sides even and pull the slider down.
- Replace the stop or sew a thread stop.
For a closed-end zipper, such as on a bag, you can also open the bottom stop, refit the slider from below, and sew the bottom shut with several tight stitches.
Tools and Supplies
- Needle-nose pliers
- End nippers or small wire cutters
- A small flathead screwdriver
- Replacement pulls or sliders
- Top and bottom stops
- A needle and strong thread
- Scissors
- A ruler
- A zipper repair kit, which bundles sliders and stops in common sizes
Method Comparison
| Method | Fixes | Time | Skill | Cost | Lasts |
|---|---|---|---|---|---|
| Paperclip or key ring | Missing tab | 1 minute | None | Free | Days to weeks |
| Clip-on pull tab | Missing tab | 1 minute | None | Low | Years |
| Paracord pull | Missing tab | 5 minutes | Low | Low | Years |
| Clamp-on repair pull | Broken slider loop | 2 minutes | Low | Low | Months to years |
| Snap-on replacement slider | Broken or worn slider | 5 minutes | Low | Medium | Years |
| Standard slider swap | Broken or worn slider | 10 to 15 minutes | Medium | Low | Years |
| Full zipper replacement | Damaged teeth or tape | An hour or more | High | Medium to high | Years |
Tips by Item
- Jackets and coats. Most use size 5 or size 8 separating zippers. Check whether the slider has a locking mechanism, and match it.
- Jeans. These use small metal zippers with locking sliders. A tailor can replace the whole zipper at low cost if the teeth are worn.
- Backpacks and luggage. Coil zippers with two sliders are common. Cord pulls work very well here.
- Boots. Heavy use and dirt wear sliders fast. Clean the teeth, and choose a sturdy metal pull.
- Tents and sleeping bags. Use size 8 or size 10 coil sliders. Carry a spare slider and a repair pull on trips.
- Dresses. Invisible zippers need a special teardrop slider. Take delicate garments to a tailor.
How to Prevent Broken Pulls
Knowing how to fix broken zipper pull tabs is handy. Not breaking them is better.
- Pull the tab straight along the zipper, not out to the side.
- Hold the fabric taut with your other hand.
- Never force a stuck zipper. Find the snag first.
- Close zippers before you wash clothes and bags.
- Keep the teeth clean. Brush out sand and grit with an old toothbrush.
- Lubricate stiff zippers. Rub a graphite pencil, a bar of soap, or a bit of candle wax along the teeth, then work the slider back and forth.
- Do not overstuff bags.
- Do not hang a bag or coat by its zipper pull.
When to See a Tailor or Replace the Zipper
A zipper pull replacement or a new slider will not help if:
- Teeth are missing, bent, or pulled off the tape
- The tape is torn or frayed
- The pin or box at the bottom of a jacket zipper is broken
- The item is expensive, waterproof, or made of leather
- The zipper is an invisible type in a formal garment
Tailors, shoe repair shops, and outdoor gear repair services handle these jobs. Some brands of outdoor clothing and luggage also repair zippers under warranty, so check before you pay.
Frequently Asked Questions
Can I fix a zipper pull without buying anything? Yes. A paperclip, key ring, or piece of cord through the slider’s loop works as a pull.
What is the fastest way to learn how to fix broken zipper pull tabs on a jacket? Buy a clip-on replacement pull and snap it onto the loop of the slider. It takes seconds.
What if the loop on the slider broke too? Use a clamp-on repair pull or replace the slider.
How do I know what size slider to buy? Read the number on the back of the old slider, or measure the width of the closed teeth in millimeters.
Are zipper sliders universal? No. Size and tooth type must match.
Do I need to sew? Not for a new pull tab or a snap-on slider. A standard slider swap may need a few stitches to make a stop.
Why does my zipper split after I zip it? The slider is worn. Tighten it gently with pliers or do a zipper slider replacement.
How much does a repair cost? Pull tabs and sliders usually cost a few dollars. A tailor may charge more to replace a full zipper.
Can I use glue? Glue rarely holds a metal tab under repeated pulling. A mechanical fix is better.
Final Thoughts
A broken tab does not mean a ruined jacket or bag. Now that you know how to fix broken zipper pull problems, you can match the repair to the damage. If the loop on the slider is intact, clip on a new pull or tie a cord through it. If the loop or the slider is broken, fit a clamp-on pull or swap the slider.
Check the size and tooth type before you buy parts, work gently with pliers, and add a stop so the new slider stays put. Keep a few spare pulls in a drawer and a paperclip in your bag. The next time a tab snaps, you will know exactly how to fix broken zipper pull trouble in minutes.
Key Takeaways
- The first step in how to fix broken zipper pull damage is to check whether the tab, the slider loop, or the whole slider failed.
- If the loop is intact, a paperclip, key ring, cord, or clip-on tab makes a quick new pull.
- If the loop is broken, use a clamp-on repair pull or replace the slider.
- A slider must match the zipper’s size number and tooth type: coil, molded plastic, or metal.
- A zipper that splits behind the slider needs a gentle squeeze with pliers or a new slider.
- Add a top stop or a few stitches after a slider swap so the slider cannot come off.
- Missing teeth, torn tape, or a broken pin and box call for a new zipper or a tailor.