All photographers aim to encapsulate the essence of their subjects. Travel photographers, for instance, want their shots to capture the deep sensory experience of being in a different place, whether they’re shooting moments of a sojourn in Montreal, of a surfing trip in Australia’s Noosa region, or of a backpacking journey through Machu Picchu and other corners of the Andes.
Every captured image is a representation of a particular moment in space and time, never to be reproduced again. That alone makes each one of these photos special to a photographer. Every so often, however, a few of them turn out to be exceptionally singular. These are usually the ones that end up being printed to be kept in the creator’s personal portfolio, hung as wall art in his living room, sold to people who appreciate his work, or immortalized in publications and in the public domain.

Indeed, capturing subjects behind the lens can be tricky enough, but converting the shots into great prints afterwards is another major challenge for photographers. The thing is, prints can never fully capture all the nuances of a subject. Somewhere between being translated from real life, to digital photo, to physical printout, intricate details of an image are lost. However, it’s still possible to make prints look as great if you find a printing company providing high quality products. Here are some basic guidelines on how to do it.
Pick the right printer
For all the benefit that laser printers offer consumers, inkjet and thermal dye technologies are still preferable when it comes to printing images on paper. Most general-purpose printers that use these technologies can produce decent photo-quality prints, but if you want better printouts, consider getting dedicated or near-dedicated photo printers instead. Dedicated photo printers are specifically made for consumers who print only photographs (e.g. photography enthusiasts and professional photographers), while near-dedicated printers are units that can print both photos and documents.
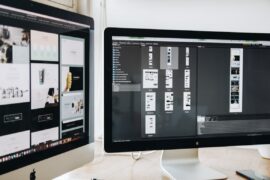
Use an appropriate monitor when editing your photos
Editing images require the use of color-accurate monitors that play a very large number of colors and offer almost true-to-life representation of photographic images. This will allow you to better prepare your images for printing. Ideally, your editing monitor should be 24-inches or larger so that you’ll be able to view your images at an appropriate level of magnification. The screen should also have a matte surface so as to prevent reflections from disrupting your work.
Make sure that your images are the right size
One good way to make sure that your printer produces the clearest, most realistic-looking printouts is by printing the photos in the right sizes. As an example, you might want to print a digital image that is 4,200 pixels by 2,800 pixels in size. If you want to create high-quality prints of this image on glossy paper at 300 dpi (dots per inch), you have to divide your photo’s dimensions by 300 to determine its ideal maximum print size. So, 4,200 pixels by 2,800 pixels would mean the ideal size is 14 inches by 9.33 inches. Any larger than that, and the quality will be diminished. Of course, you can always choose to print at a lower dpi. At 200 dpi, 4,200 by 2,800 pixels would translate to 21 by 14 inches. It goes without saying that you need large-format printers to print such sizeable images.
Use the right type of paper
Don’t just use any normal writing paper when printing out your photos. This type of paper absorbs too much of the ink or dye, causing the details of your images to disappear.
To ensure the best quality printouts, use only photo papers. You can experiment with the different types of photo paper products available in the market. There are glossy, semi-glossy, and matte variants that will afford you different types of finish, depending on the kind of effect that you are aiming for.
Use the right kind of ink
Lastly, make sure to use only high-quality ink products like HP Deskjet 2050 Printer Ink when printing your images. Ink cartridges that have been refilled using one of those DIY refill kits or those that have been recycled by quick refill shops tend to be very dodgy when it comes to quality. They will just leave you disappointed with the resulting prints, and they might even damage your printing equipment. Stick to original equipment manufacturer cartridges, or if you want to save money, buy only premium remanufactured or compatible cartridges from reputable third-party suppliers.
Author:
John Newman is a writer with a background in business and technology journalism as well as public relations. He mostly writes content about Remanufactured Inks & Careers. In his spare time, he enjoys surfing and traveling the world.


