In our busy lives, we don’t have time to learn how to make a complicated web site, delve into the computer code and becoming a graphic artist too. Instead, we’re looking for an online web site solution that is fast, efficient and delivers what we need for our new online presence. Website builder delivers in all these areas and more.
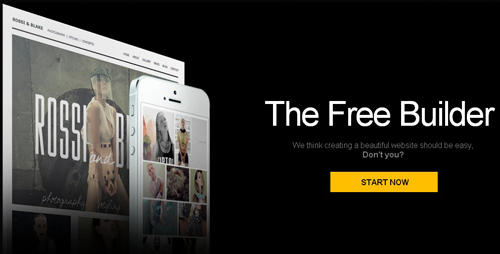
The platform is free for anyone to use. Just visit the home page and take a look at the many professionally-designed web site templates to choose from. You have a choice whether to use one of these templates or to design your own site using individual elements from their online tool.
Professional, Responsive Templates
The templates have been created to be responsive, which means they morph into different shapes and sizes depending on the viewing screen. Because of this, they look excellent on a 4-inch iPhone 5S, a 6-inch “phablet,” an iPad Air with Retina display or a PC.
There are many different categories covered with templates for multiple industries including photographer, designer, architect, wedding presentation, legal, biographical inc. CV’s, etc. Mobile sites also have a special category which is helpful when needing to find a site template that really “pops” on a small screen.
The templates use the latest HTML5 coding to make them extremely flexible. HTML5 has replaced Flash which often crashed web browsers or was incompatible. With modern coding techniques using this base, all sites run smoothy and look good in any modern web browser across all platforms from PC to Mac to mobile.
Starting a Site
To get started, it’s as easy as clicking the yellow Start Now button on the home page.
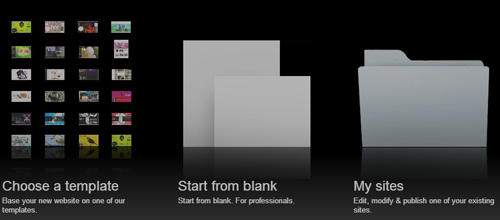
You will then be presented with a choice to Choose a Template, Start from Blank page or view My sites.
Choose a Template
On the template selection page, you will be shown a list of template categories down the left side. When clicking on a selection, the available templates will appear running down the page. You can then scroll down the page to see all the designs in that category; usually there quite a few to choose from.
By hovering the mouse over a template graphic, the options appear below the image to either Edit the template or Preview it. The editing process is described in the next section. The preview simply shows how the template will look to a visitor, so you can test it out on your PC or mobile device before editing it to your needs.
Editing a Site
Whether choosing to use an existing template or opting to start from scratch, you’ll reach the same editing screen.
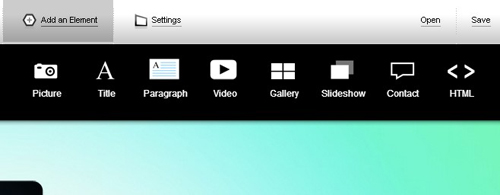
On this screen are three main options: Pages, Add an Element and Settings. There are additional options on the right side to Open, Save, Save As, Preview, Help and a large blue Publish button.
If you have chosen a template, the first page from the template is shown below.
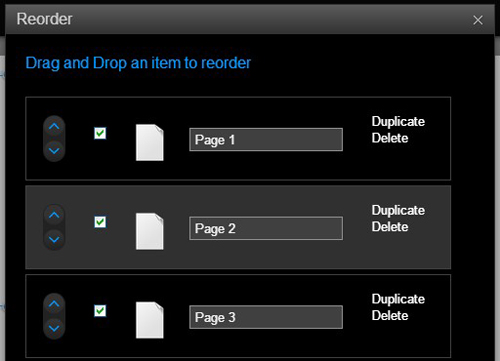
By selecting the Pages option, you can manage the existing pages for the site, add a new template page (if working from a template) or add a blank page.
If selecting Add an Element, then a series of buttons are rolled out which provide a lot of customization. Add a title, a new paragraph, an image, a video clip, a gallery or a slide-show to present a range of products, create separate sections on the page, or add some special HTML code or a widget.
The Settings option grants access to edit SEO settings, add a favorite icon, change the background and alter page sizes, set your site name or add your Google Analytics ID for visitor tracking.
Putting It All Together
When you have either edited one of the existing templates or designed your own web site page by page, you’ll want to see the final product.
The Preview option near the top right corner of the screen will let you see the web site in progress. This allows you to preview the site and flip through the pages just like a real visitor will do. You can see how it all looks and decide whether you need to add more elements or if your design or changes are complete.
You can then return to the editor with a single click, to make further changes or add new parts to a page that you forgot to include. When you think that you’re finished, make sure that you’ve added a name for your site, then go ahead and hit the big Publish button. Once final checks are run, the site will be hosted free of charge for you and launched on the web to an unsuspecting public!
Using the beautifully designed templates is the best way to start with a good canvas and make edits or tweaks from there. The beauty of the Website-builder.com system is that it’s so easy to go back in later to add a new feature or change a detail, without the need to track down the original web developer just to make a minor change. You have the control to create a site and make changes to it yourself without needing to wait. And best of all, the site is free to use.


