Today we will draw an interesting In-Car Media Multiplayer and Receiver.The tutorial is not an advanced tutorial and mostly creted by using Blending Options so it will be good for the beginners.
In order to understand easily and follow steps better i separated the shape into 3 parts in my mind.Left,Screen and Right Part.
Now let’s begin the tutorial.Please give your layer names by your own.
Final Image
Step 1
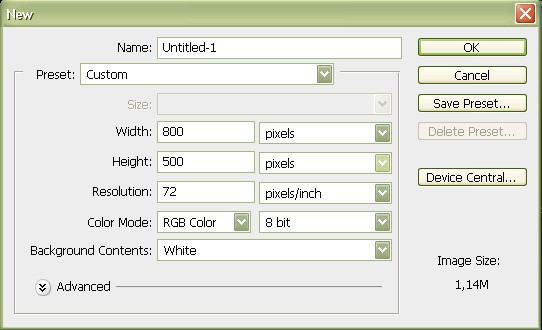
Let’s start by creating a new document at 800px by 800 px
Step 2
Create a new layer,name it Base and then create the base of the player using Rounded Rectangle Tool(U) with Radius of 95 px and color code #626262
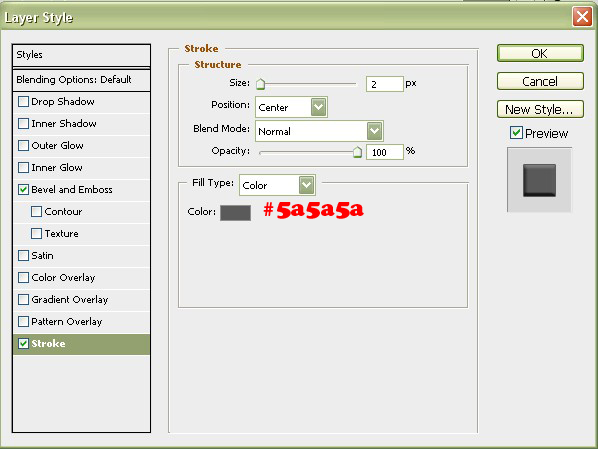
Apply these Blending Options to the rounded base shape
Stroke
Bevel and Emboss

STEP 3

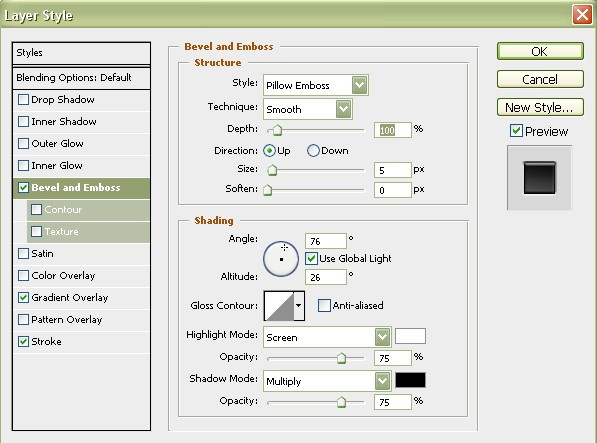
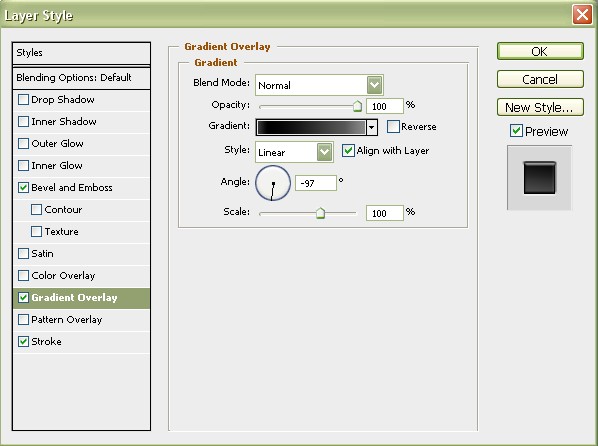
Create a new layer,using Ellipse Tool and holding down Shift Button(for the exact shape) draw a circular shape and apply these settings to the circular shape.
Bevel and Emboss
Gradient Overlay

Stroke

Step 4

Now draw a circular shape again using Ellipse Tool with holding down Shift and color #0080c7
Step 5

Create a new layer and draw a circular shape using Ellipse Tool(U) again holding down Shift and color code #cccccc then apply the below layer styles.
Outer Glow

Bevel and Emboss

Stroke

Step 6
Now create a new layer and draw a shape using Ellipticall Marque Tool fill it with gradient of below settings and then below layer styles.


Step 7

Create a new layer and draw a circular shape again with using Ellipse Tool and color code #6f6f6f and apply below layer styles.
Inner Shadow

Bevel and Emboss

Step 8

Create a new layer,name it Numbered Button and draw circular button using Ellipse Tool with color code #000000 holding down shift key.Apply the settings below.
Bevel and Emboss
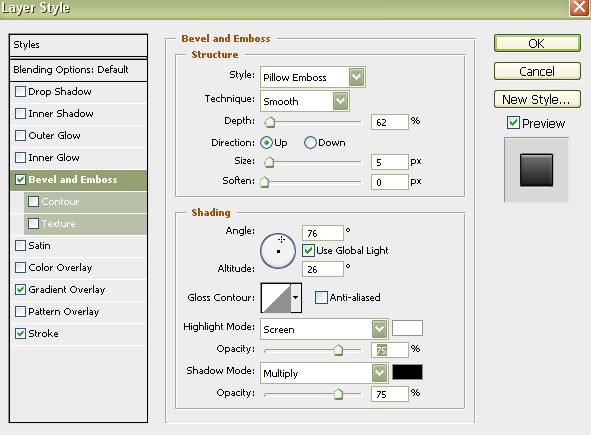
Gradient Overlay

Stroke

Duplicate Numbered Button Layer 4 times and place them as you see in the picture and then write the numbers on the buttons.I used color code #1075dc
Step 9
In this step we will use Creating Clipping Mask.
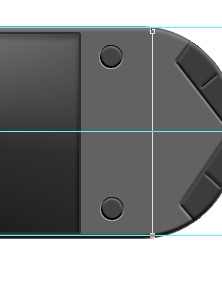
Now,create a new layer and draw a rectangular shape over base layer by Rectangular Tool with color code #404040 as shown in the below picture.

When you are on the new created layer,Right-Click the mouse and select Create clipping Mask and the result will be something like below picture.Then you can move whereever you want on that layer.
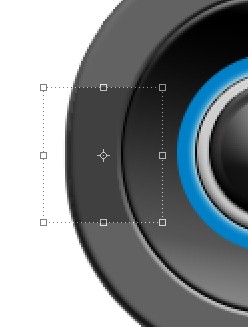
***Don’t forget!!!.The new created layer will be just on top of the Base Layer.
Apply the below Layer Styles to the masked button you created.
Bevel and Emboss
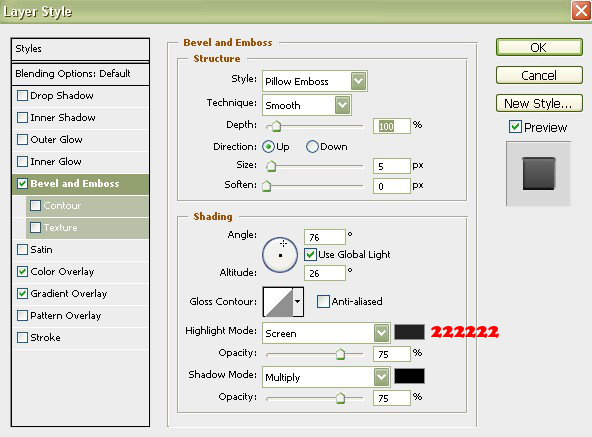
Gradient Overlay

Now do the same for the other 4(left side and right side of player) buttons and replace it which position you want.Create a Group and put all layers in that Group.My result is like this:
Step 10
In this step we will add some emboss dots to the left blue controller.

Create a new layer and name it Emboss Dots.Draw a circular with Elliptical Marquee Tool,fill with gradient and then give Bevel and emboss effect like in the picture.Then duplicate the layer 9 times and replace the dots.
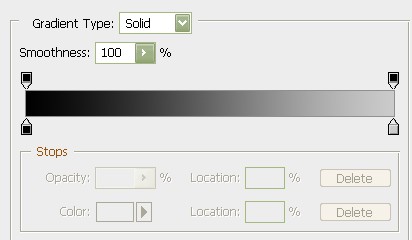
Bevel and Emboss

Step 11
Now we will create the screen part.Draw a rectangular shape using Rectangle Tool.Color code is 2e2e2e and apply the below Layer Styles.
Inner Shadow

Bevel and Emboss

Stroke

Step 12

Another easy step.You see on the right side,we will create 2 circular buttons.
Create a new layer and draw a circular shape with Ellipse Tools.Don’t forget to hold down Shift key.Color code is #000000 and apply the below layer style.Then duplicate the layer replace the new one as you see in the picture.
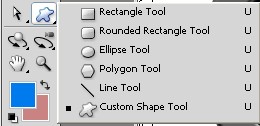
Use the Custom Shape Tool and select the circular shape and draw with red color.Then with Eraser Tool,erase the top part of the circle and draw a line with Line Tool to create the turn on/turn off button.
![]()
Bevel and Emboss
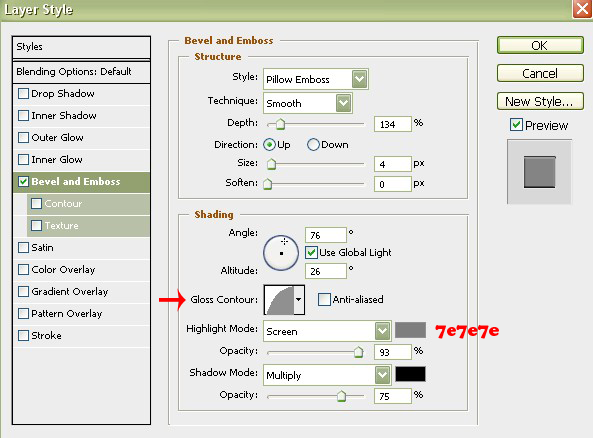
Step 13
Now we will create a line to give a better look to the player.Draw a line using Pen Tool like in the below picture.Hold down Shift Key to draw the line straight.
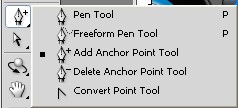
Now,we will add Anchor Points with Add Anchor Point Tool to give a different look.Draw the line however you want.
Now Right Click mouse and Stroke the path As you see in the below picture,stroke with brush but select a hard and low diameter brush.After that,hit Delete on your keyboard.
Apply the Layer settings as below and the result will be like the above
Bevel and Emboss

Gradient Overlay

Step 14

Now we will add 2 separators for the right buttons.Draw 2 lines 1px for each button and apply the below Layer Styles and then duplicate the line layer and move it onto the other button.
Bevel and Emboss

Step 15
Now it’s time to add the function names and a few words to show the properties of the player.Create a new layer.For the button functions and signs i used the Custom Shape Tool and Type Tool draw and write with blue color.
If you want to give a shiny and reflection effect then group all layer into 1 group.Duplicate the group and then Edit/Transform/Flip Vertical,move the duplicated group just under the main group,lower the opacity and erase a little.
Hope you like the tutorial.Feel free to ask any questions.
We offer self paced testking CISSP training program to help you pass real exam on time. Download the testking 640-822 dumps and testking 70-649 study guide for fail safe exam preparation.


